A Calendar view organizes and displays records on a calendar.
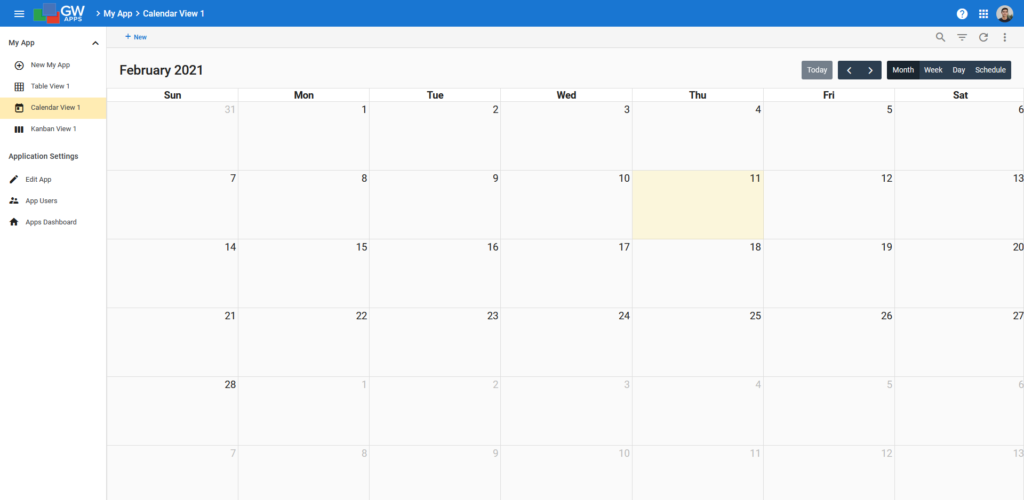
In this article, we are going to cover the Calendar specific setting available on the middle tab in the View Editor that is view type specific. For a Calendar view, it is called ‘Calendar’

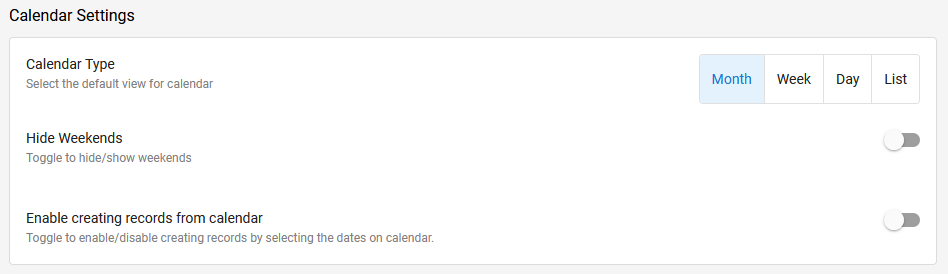
Calendar Tab
| Item | Description |
| Calendar Type | Sets the calendar’s default display format. This can be changed by the users within the view itself, in the top right corner of the view. However, upon leaving the view and returning, the view will again be set to this default display format. |
| Hide Weekends | Hides weekends from the calendar display. |
| Enable creating records from calendar | Allows users to create records by selecting a day on the calendar, or by clicking and dragging to select a series of days. Doing so will open a form and auto populate the ‘Start Date’ and ‘End Date’ fields with the day(s) you pick. After toggling this on, you will be asked to select which calendar you would like new entries created in. Note: If you have enabled the preview pane in the ‘Settings’ tab, the new calendar entry will open in the preview pane, else it will open using the form in full screen style. |
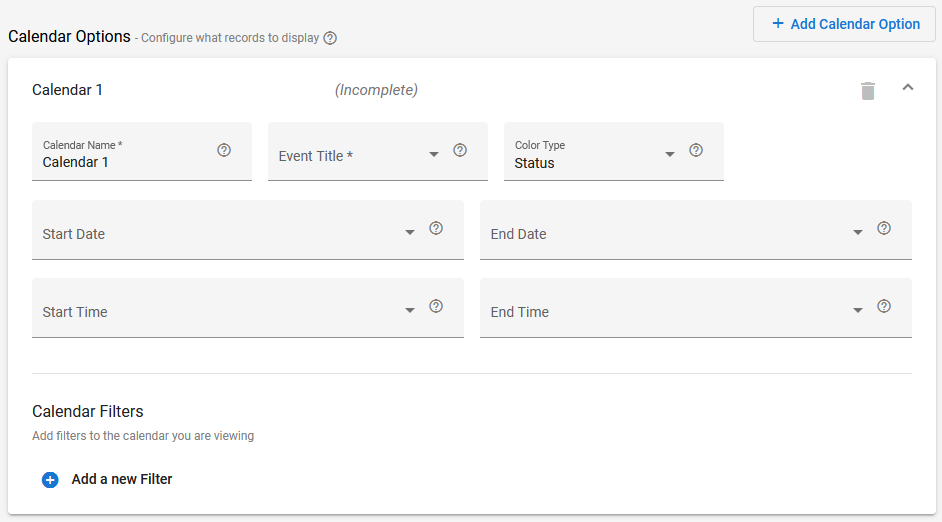
These options determine how your records will display on the calendar. You can have multiple option sets; click ‘+ Add Calendar Option‘ in the top right to create a new set of options.
| Item | Description |
| Calendar Name | The name for this set of calendar options. This name is not visible to users of the application, they will only see the view’s name. |
| Event Title | Select the field from the form that will display as the title for the event on the calendar. |
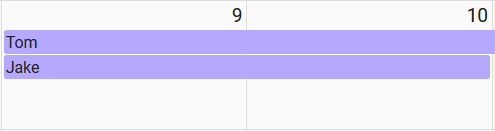
| Color Type | Defines what information is used to set the color events display with. Setting this option to ‘Status’ will color each record with its corresponding status color. You may also use a custom color. |
| Start Date | Select the field from the form that will define the start date of the event on the calendar. (If ‘Enable creating records from calendar‘ is enabled, this field will auto populate with the selected day(s).) |
| End Date | Select the field from the form that will define the end date of the event on the calendar. (If ‘Enable creating records from calendar‘ is enabled, this field will auto populate with the selected start date.) |
| Start Time | [Only display of there are any Time fields on the form] Select the field from the form that will define the start time of the event on the calendar. (If ‘Enable creating records from calendar‘ is enabled, this field will auto populate with the selected end time, if a time range was selected from the Day calendar display format.) |
| End Time | [Only display of there are any Time fields on the form] Select the field from the form that will define the end time of the event on the calendar. (If ‘Enable creating records from calendar‘ is enabled, this field will auto populate with the selected end time, if a time range was selected from the Day calendar display format.) |
Calendar Filters is similar to the Filtering found in the Filters Tab. However, this setting allows you to add specific filters to specific calendar option sets. For example, if you want a user to only see records they created for a specific event, but also be able to see all records of another event, you would add a ‘Created By’ filter in the options here, rather than in the general filtering (which would filter all records).
Note: Filters here may override the general Filtering, if conditions conflict.

Next Steps
| Below are links to articles that cover how to adjust the design of a view while looking at it, using in-view editing: |
| Views: In View Editing |
| Below is the link to the view building part of the Building an Expense Reports App tutorial series: |
| Part 7 – Views |