A Table view is the most common type of view. It organizes your records as a table or list, usually in a predefined sorted order. Your email inbox is an example of this kind of view.

In this article, we are going to cover the Table View specific setting available on the middle tab in the View Editor that is view type specific. For a Table view, it is called ‘Table Columns’
Table Columns Tab
The Table Columns tab is where you can specify and organize the data columns that you wish to display in the view.
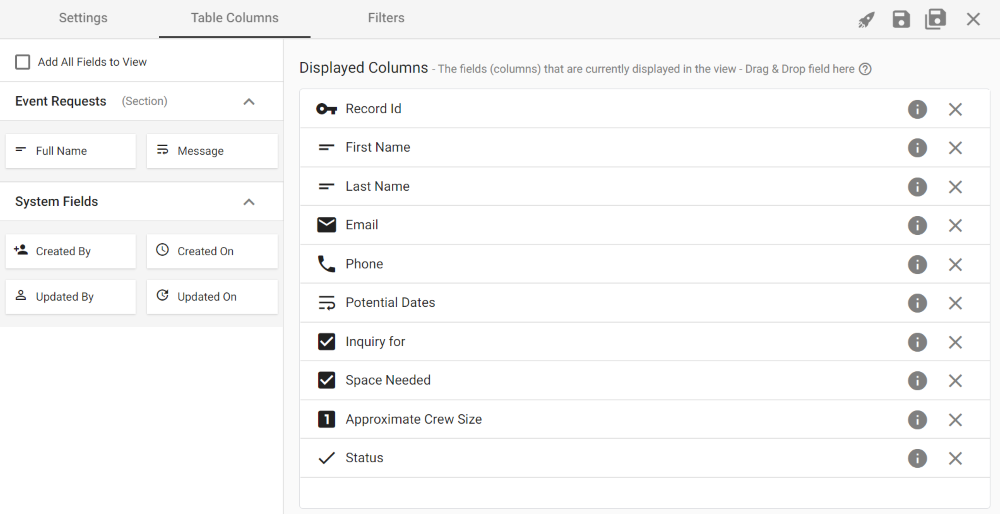
The left side palette displays all of the available fields from the form that can be displayed in the view, grouped by the form section they appear in. To add a field to the view, simply drag-and-drop it into the ‘Displayed Columns’ list to the right. Selecting the ‘Add All Fields to View’ checkbox at the top of the palette will add all fields to the view in one step. Deselecting the ‘Add All Fields to View’ checkbox, however, does not remove any fields from the displayed columns.
To rearrange the fields, simply drag-and-drop them within the Displayed Columns list. The fields will display on the view header from left (top) to right (bottom).
To remove a field from the Displayed Columns list, click the ‘X’ on the far right of the row for the field you wish to remove.
Table Columns Tab – SLA Fields
For any form where SLAs have been defined, SLA data fields will be available in the left side palette. Each defined SLA will have a section in the palette with 8 data values specific to that SLA. You can also drag any of these SLA fields into you view to display that data in the view. For each defined SLA, the following data fields are available: Due Date, Opened On, Closed On, Delayed, Opened By, Closed By, Duration and Status. (For more details on the meaning of these data items, please see the Interpreting the SLA Report section of the SLA article.
Field Column Settings
 | Select the ‘Properties’ icon next to a field in the Displayed Columns list to specify additional settings for that column. |

| Item | Description |
| Override Field Name | Enabling ‘Override Field Name’ and entering a new column name in the ‘Custom Name’ field will change the column name in the view, but it will not affect the original field on the form. When overriding the column name, the original field name will display in (parentheses) after the new column name, in the Display Columns list. |
| Column Width | Controls the displayed width of the column in the view. Select from five options from ‘XSmall’ to ‘XLarge’. All columns default to the middle option of ‘Medium’. |
| Alignment | Controls how the column will be aligned in the view. Select icons for ‘Left Aligned’, ‘Centered’ or “Right Aligned’. |
| Wrap Column | Controls is used to manage content overflow for the column. The options are: – Clip – Hides all extra characters once the column width is reached. There will only ever be on line of content. – Wrap – Will wrap the field contents at the column width, and the content may take up multiple lines. – Wrap (Word Break) – Will wrap the field contents at the column width but only break the text at a space between words. The content may take up multiple lines. |
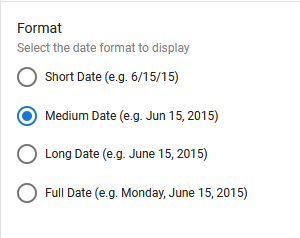
| Format | Some fields will have an additional Format section below the ‘Wrap Column’ settings. These settings are data type specific. (See example below.) |
Next Steps
| Below are links to articles that cover how to adjust the design of a view while looking at it, using in-view editing: |
| Views: In View Editing |
| Below is the link to the view building part of the Building an Expense Reports App tutorial series: |
| Part 7 – Views |