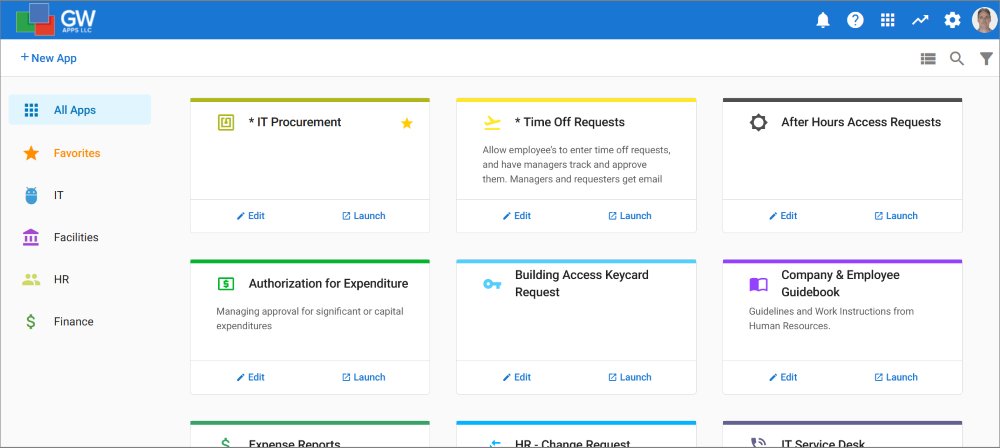
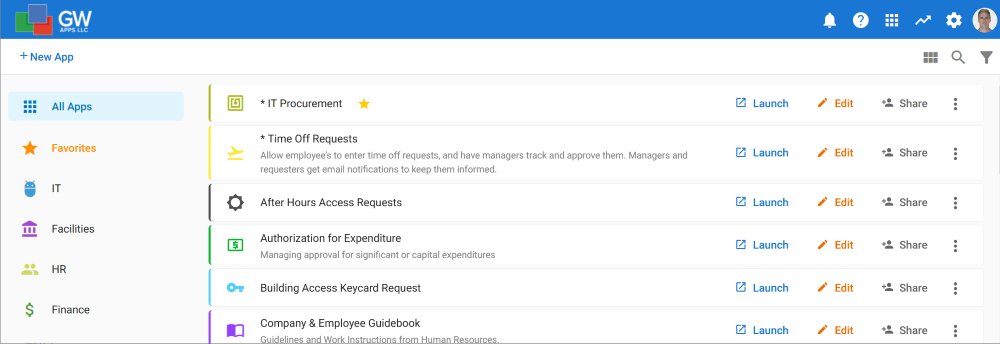
The Applications Dashboard is the starting point in GW Apps – It’s the first thing you see after you log in. It shows all the applications available to the signed-in user. It can be arranged as a list view or as a tile view, by selecting the icon in the top right corner. There is also a list of application categories, displayed on the left side of the screen, to organize the apps in a structured way.
The App Dashboard
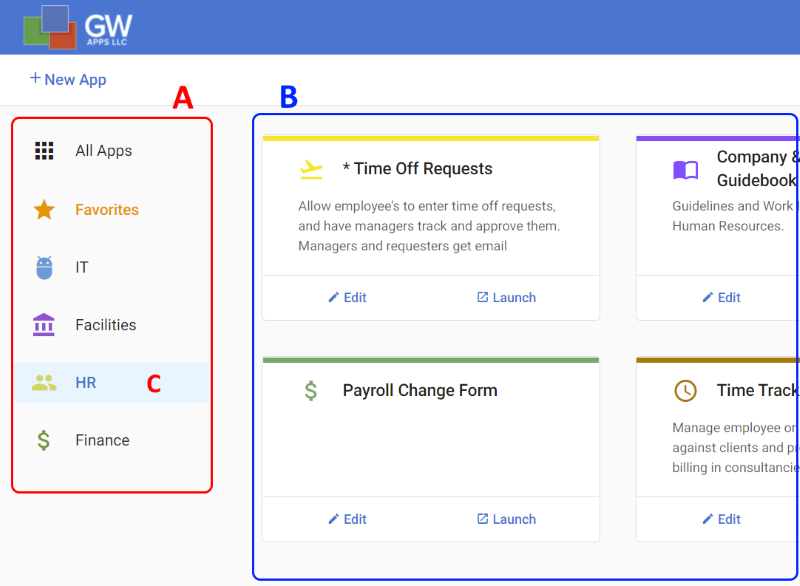
| A | Application Categories – Click on the desired category to display only the apps that have that category assigned. |
| All Apps – Shows all apps the current user has access to, regardless of category. | |
| Favorites – Shows the apps the current user has marked as a favorite. (See details below on how to mark apps as a favorite.) | |
| Other Categories – All Apps and Favorites always display, the additional categories are configurable via the Appearance section of the Platform Settings. | |
| B | Applications – The Apps for the selected category display here. They can be shown as either a Tile view or a List view. |
| C | Selected Category – In this example, the “HR” category was selected, so only apps assigned the “HR” category are displayed. |
Tile view example
List view example
When an application is not currently selected, only three options show:
| Search – Opens the search field and allows the user to search for an application by name. | |
| Grid View – Switch to the grid view. | |
| List View – Switch to the list view. | |
| Filter – Toggles the display of the left side list of application categories on and off. |
When an application is selected, six options are shown:
| Search – Opens the search field and allows the user to search for an application by name. | |
| Share – Allows you to share this app with users. This gives the user permission to use the app, and optionally sends them an email to let them know they now have access to the app. | |
| Launch – Opens the application to be used. (Double clicking on the tile or list view row for an application will also launch the application.) | |
| Edit – Opens the app in the app editor | |
| Filter – Toggles the display of the left side list of application categories on and off. | |
| Grid View – Switch to the grid view. | |
| List View – Switch to the list view. |
Marking Apps as Favorites
To make an application appear for you in the Favorites category, you need to mark the app as a favorite by clicking on the star on the app’s tile or list row. To remove it from your favorites list, just click on the star again to deselect it.
Marking Apps as Favorites
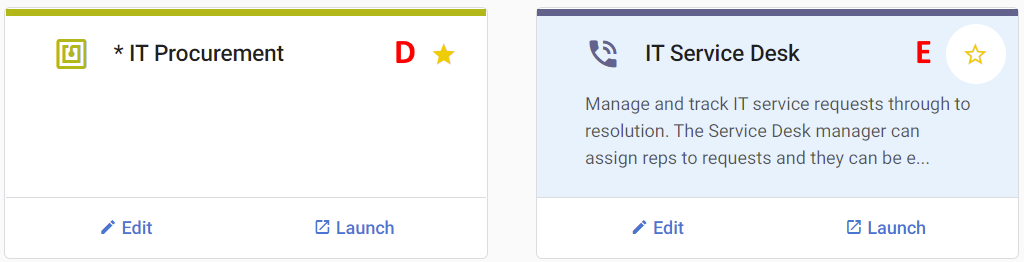
| D | This app is currently a favorite for the current user, as the star icon is solid gold color. If you click on the star it will clear the favorite status and the star will change to having a white center. |
| E | This app is currently not favorited for the current user. When you hover your mouse over the tile or row for the app, you will be able to see the unselected star icon (it has a gold outline, but is white in the center). Click on the star to mark it as a favorite. The star will become solid gold in color. |
Creating a New Application
To create a new application, click on the +New App button at the top left of the applications dashboard.
| Opens the application creation dialog. |
Editing an Application
To edit an application, either select it and click on Edit App, or launch the app and select the Edit App option from near the bottom of the application’s left side navigation menu.
Next Steps
| Below are links to articles that cover the main areas of the Designer Navigator: |
| Application Designer |
| Below is the link to the episode of Building an Expense Reports App tutorial series that includes a description of the Designer Navigation: |
| Part 2 – Starting the Expense Reports App |