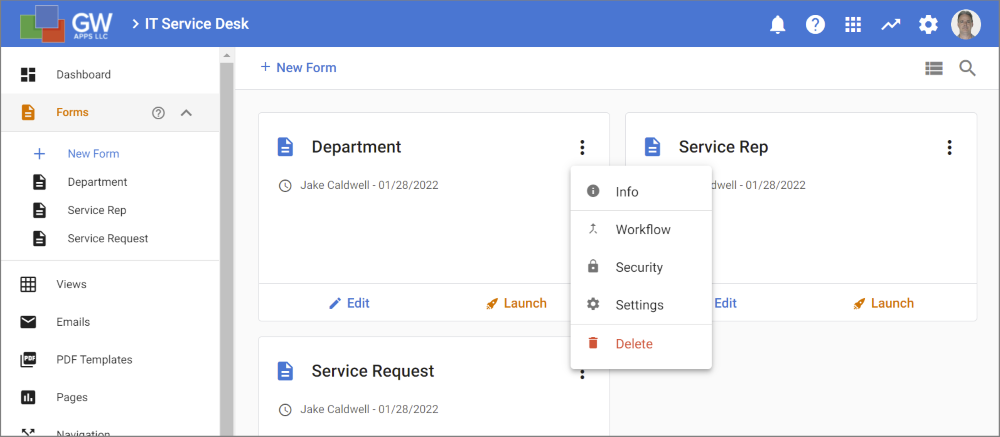
An App Designer can access the Forms Dashboard, where they can create and edit GW Apps forms, by clicking on the Forms button from the left side navigator.
![]()
Forms Dashboard
The Forms Dashboard shows all available forms for the current application, displayed as a set of tiles. An App Designer can create and update them from here. Clicking on a form’s tile will open the form in the Form Editor. Alternatively, you can also select the ‘Edit’ button on the bottom of the form tile.
| Forms Dashboard |
 |
Each form tile also has the following buttons:
| Item | Description |
| Edit – Opens the form in the Form Editor | |
| Launch – Launches the application and loads the form so it can be tested or used for data entry. | |
| Additional Options Menu – Featuring the following options. | |
| Info – Opens the form information dialog, containing basic form information and an audit history of design changes. | |
| Workflow – Opens the form in the Form Editor with the Workflow tab displayed. | |
| Security – Opens the form in the Form Editor with the Security tab displayed. | |
| Settings – Opens the form in the Form Editor with the Settings tab displayed. | |
| Delete – Deletes the selected form from the application. |
Creating a New Form
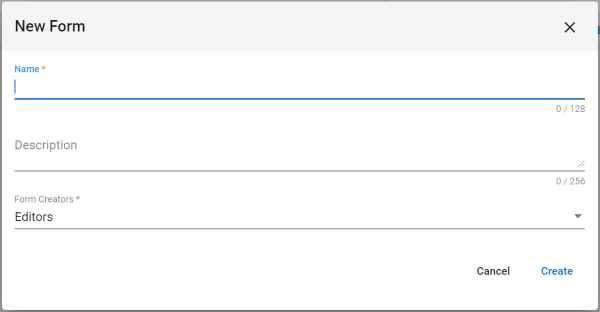
To create a new form, click on the + New Form button on the action bar at the top of the screen. You will be presented with the Create Form dialog:
| New Form Dialog |
 |
| Item | Description |
| Name | Enter the name of the new form. |
| Description | Enter a description for the form, help clarify its purpose. |
| Form Creators | Select the names of the Roles that will be allowed to create new records of this type. You can leave it as the default value for now and update if you don’t have the roles organized yet. |
| Click to close the dialog and cancel the new form creation. | |
| Click to close the dialog, create the new form, and be taken to the form designer with the new form loaded. |
Next Steps
| Below are links to articles that cover how the form designer works: |
| Form Editor Overview |
| Below is the link to the dashboard and form creation part of the Building an Expense Reports App tutorial series: |
| Part 3 – Starting the Expense Reports Form |
