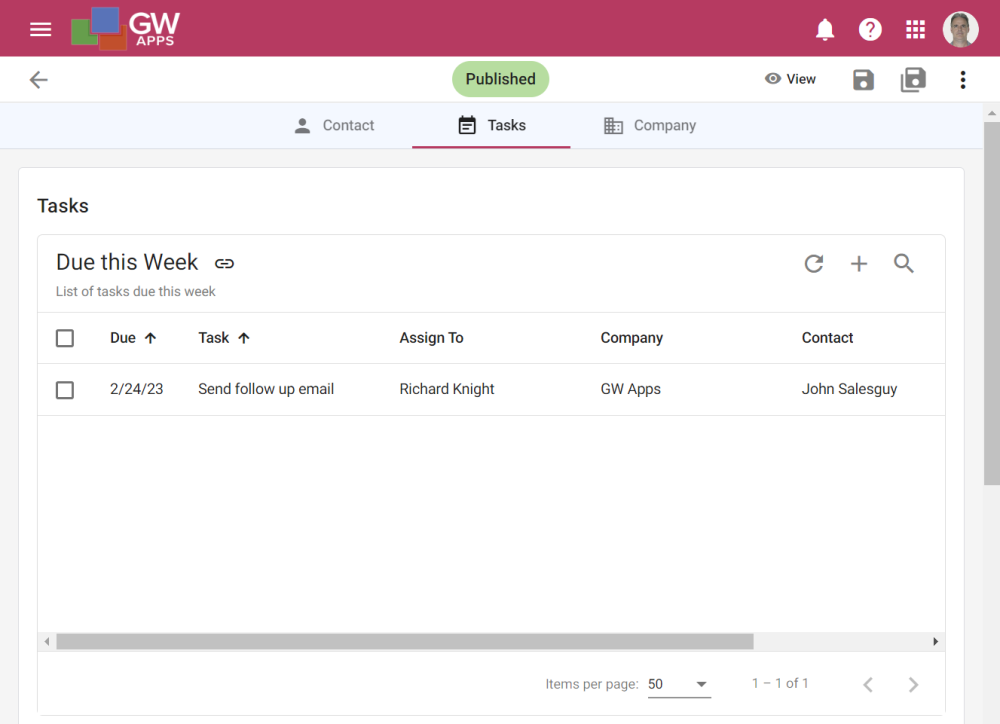
A View component allows a designer to embed a view in to a form. The view must be from the same application, but it does not have to display records that relate to the current form. An example would be for an sales opportunity or CRM application, there might be a contact form that stores information of a contact at a company. In this form you might want to display a list of the tasks or sales opportunities you have that relate to this contact. You could do this by adding a View component and setting it to display the tasks or sales opportunities views.
| An example of a View component |
 |
Adding a View to a Form
To add a View component, drag it from the left side palette onto the desired location on the form. As views tend to be wide, it is best to put them so they display in the full width of your form, and not in a 2, 3 or 4 column container.
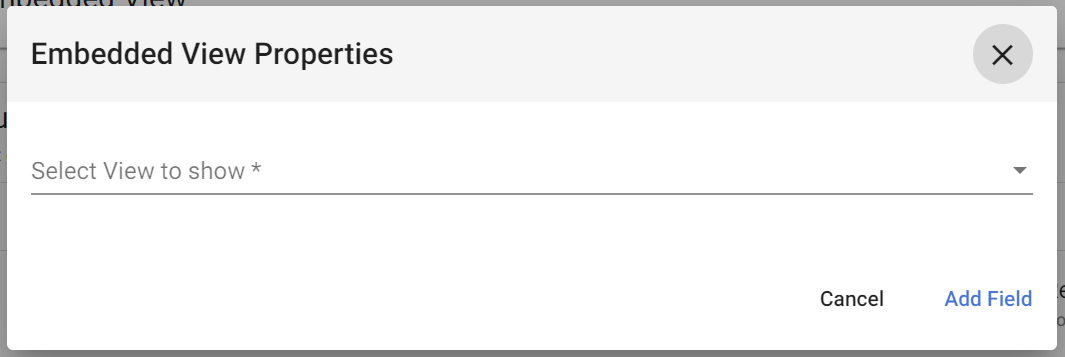
Once the View component has been dropped onto the form a dialog box will appear that asks for which view to display. Select the desired view and click on ‘Add Field’. Once the view component had been added, it is not possible to change which view is displayed. To change the displayed view, you will need to deleted the current view component and add another one displaying the new view.
| View Component – View Selection |
 |
View Component Properties
The properties panel allows the App Designer to further customize the table.
| Setting | Description |
| Basic Tab / General Section | |
| Display Name | If you would like the view to have a text header, enter the desired text here. |
| Description | If you would like the view to have a text description, displayed in smaller font below the Display Name, enter the desired text here. |
| Basic Tab / Filters Section | |
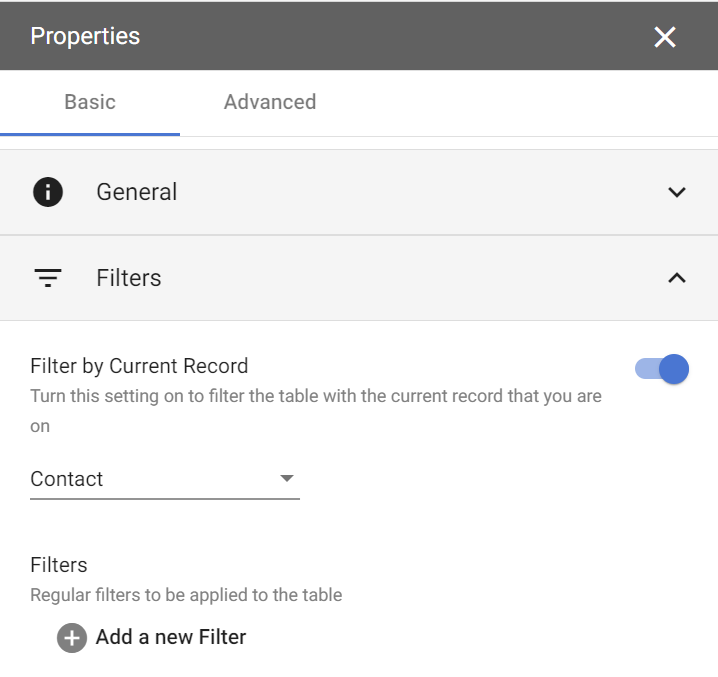
| Filter by Current Record | This setting will filter the view based on the selected field on the current record that you are on. |
| field selection dropdown | This dropdown field will show the fields that directly link these two record types. These will be Dropdown or Lookup Fields field types where the selected value is looked up from another record, and that other record is of the form type displayed in the selected view. For example: If we are on a contact form and have selected a view that displays opportunity records, and the opportunity form has a dropdown field to pick the associated contact by looking up contact records, then that associated contact field would display in the field selection dropdown. |
| Filters | Allows to you to filter which records will be displayed in the view. For example, only showing Service Reps that work in the same state as listed in the “Customer Location State” field on the same record. Any filter added here will work in conjunction with any filter set by the ‘Filter by Current Record’ option, if there is one. See Form Fields & Components: Lookup Filters for more details on setting a lookup filter. |
| View Component – Filters |
 |
| Setting | Description |
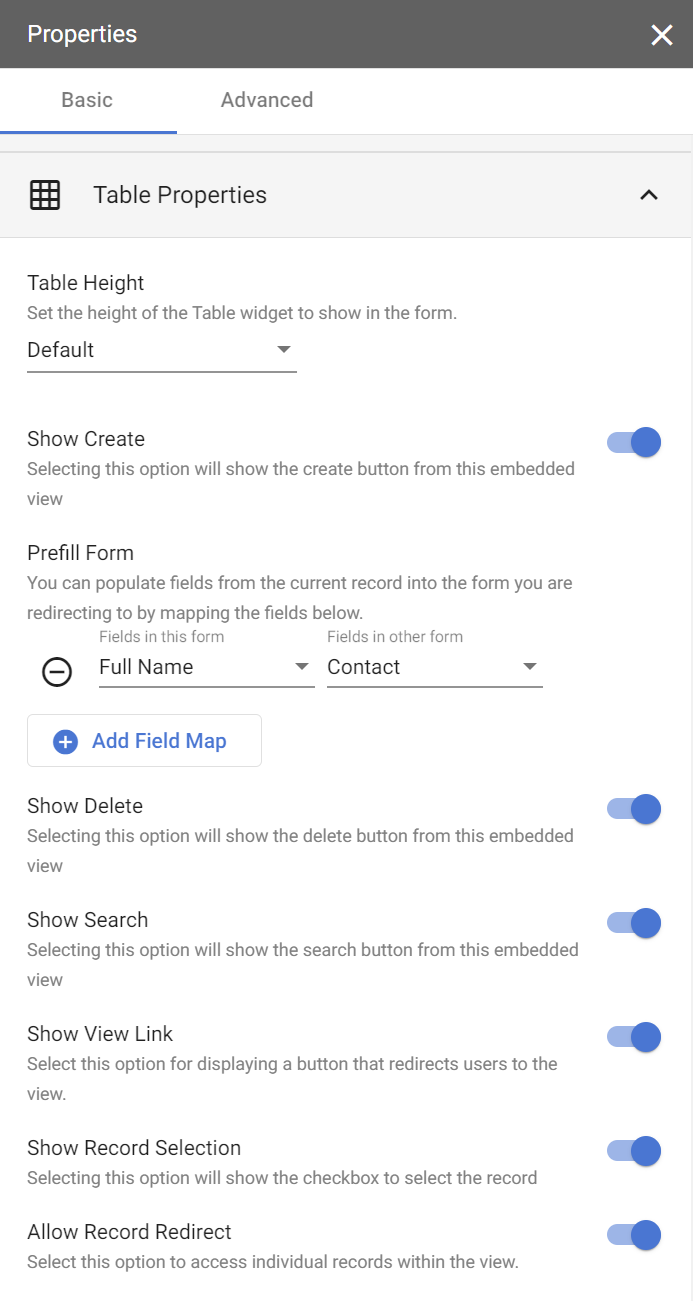
| Basic Tab / Table Properties Section | |
| Table Height | The display height of the embedded view on the form. Select between: – Default (smallest height) – Medium – Large – X-Large |
| Show Create | Enabling this option will show the create new records button (+ icon) at the top of this embedded view. |
| Prefill Form | Allows you to define fields on the current form whose values will be copied into fields on new record created by clicking the create new records “+” button at the top of the view. The mapping will only allow fields with similar data types to be mapped together. Click on ‘Add Field Map’ to add a new pair of mapped fields: A field on the current form you have embedded the view on, and a field on the form of the records displayed in the selected view. |
| Show Delete | Enabling this option will show the delete records button (trash can icon) at the top of this embedded view. |
| Show Search | Enabling this option will show the search view button (magnifying glass icon) at the top of this embedded view. |
| Show View Link | Enabling this option will show the view link button (link icon) next to the view’s Display Name at the top of this embedded view. Clicking on the View Link will open the view full screen in GW Apps. |
| Show Record Selection | Enabling this option will show the record selection check-boxes at the left of each row in the view, like in a normal non-embedded view. This option is disabled by default as you might only want to show users the related records and not have them take actions on selected records. |
| Allow Record Redirect | Enabling this option will allow to directly navigate to a specific record by clicking on it in the embedded view. If this option is turned off, then |
| Advanced Tab / Conditional Visibility – Conditional Visibility |
| View Component – Table Properties |
 |
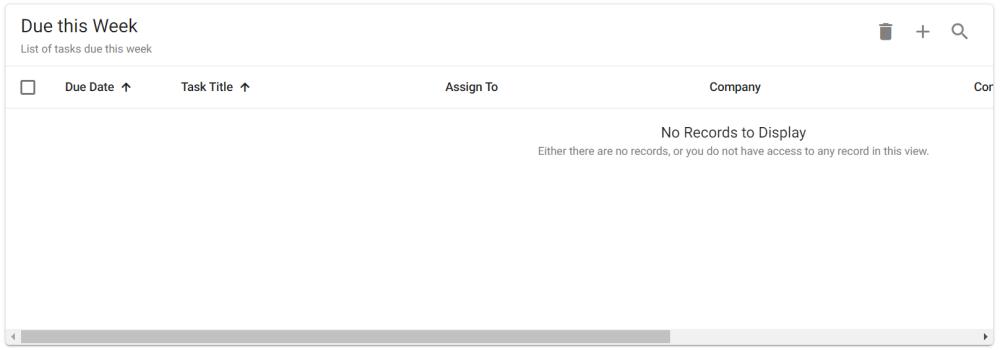
View Component Usage Example
| Embedded View Usage Example |
 |