Workflow is just another name for an approval or review process that a record might have to go through. A workflow stage is a step in the review/approval process where a record will wait for a user to take an action, such as approve, reject, or assign to a colleague.
Note: This page is about the original workflow user interface (UI), now found on the ‘Workflow Old’ tab. The new workflow UI is available on the ‘Workflow New’ tab. The available features are similar, but a few of the latest minor features are only available via the new workflow UI.

Workflow Stages Example
As an example, let’s say a contract needs to be reviewed and approved by Legal and Finance, before being sent to the division VP for final approval. In this example, the workflow stages might be:
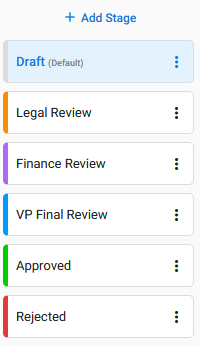
This workflow could be drawn in a diagram, such as shown below, where each blue box is a workflow stage and the arrows show how you can move between them:

Creating Workflows
Workflow creation is split across two tabs in the Form Editor, the Workflow tab and the Security tab. The Workflow tab is used to define the workflow stages and the actions available at each stage. The Security tab is used to control who can see and edit which fields and press which workflow action buttons at stage in the workflow.
On the workflow tab the following can be done:
- Create workflow stages, the steps in the review and approval process.
- Create workflow action buttons, the workflow activities a user can initiate by clicking on a button, such as approve.
| Default Workflows tab |
 |
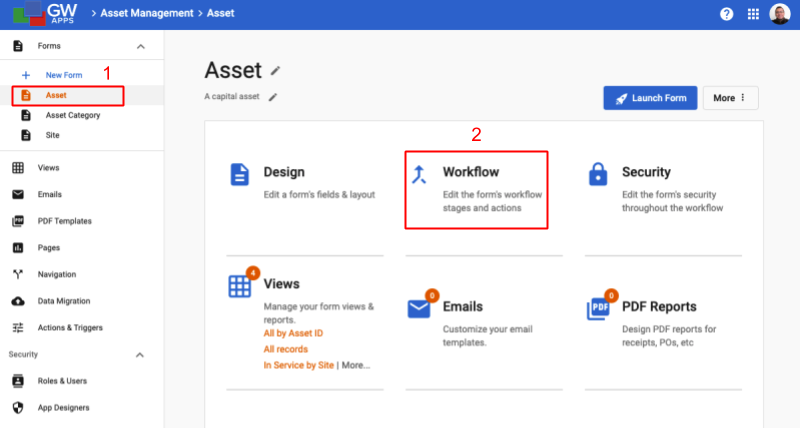
Workflow Stages are created and managed from the Workflow tab on the forms design. To access the Workflow Stages of a form:
| Edit App > Click on the desired form’s tile (1) > Click ‘Workflow (2)’ |
 |
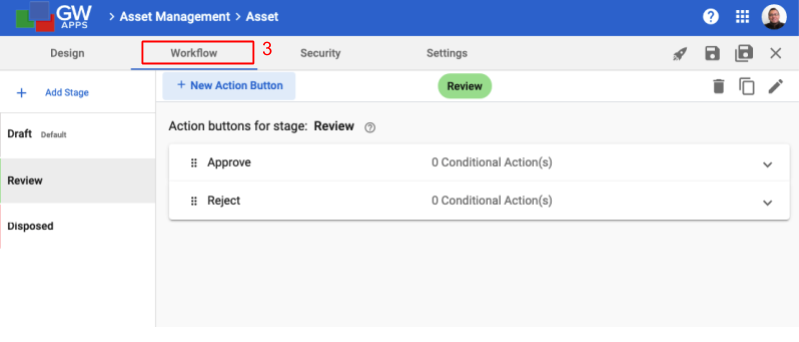
| Once the Form Editor opens > Click on the Workflow tab (3) |
 |
Workflow Stage Creation
| Workflow Stage Tools |
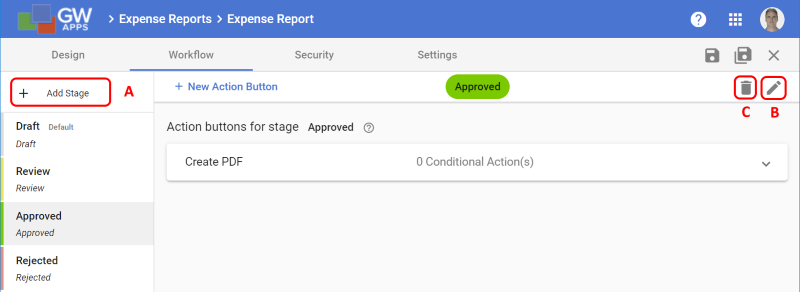 |
The Stage tools allows you to add, remove and edit stages. The Stage tools can be found on the left side of the Workflows tab. Initially there are two starter stages, Draft and Completed. These stages can have their settings edited and their names changed. The Completed stage can be deleted, but the Draft stage can’t be moved or deleted.
| Item | Description |
| Click + Add Stage (A) to add a new stage to the end of the current form’s workflow. Once it has been created it can be moved to a different place in the order, if required. |
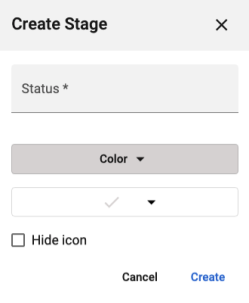
| Create Stage Dialog |
 |
| Item | Description |
| Stage Name | Enter the name of the new stage. |
| Status | Enter the status label records should have while they are at this stage. This is usually the same as the Stage Name. |
| Stage Color | Click on the color sample square to use the color picker widget to select the desired color, or enter the color as a Hex code. |
| Click to close the dialog and cancel the new stage creation. | |
| Click to close the dialog, create the new stage, and be taken back to the Workflows tab. |
Editing a Workflow Stage
![]() To edit a stage, click on the desired stage in the list on the left, then click on the Edit Stage pencil icon (B) at the top right.
To edit a stage, click on the desired stage in the list on the left, then click on the Edit Stage pencil icon (B) at the top right.
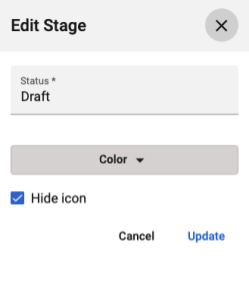
| Edit Stage |
 |
| Item | Description |
| Stage Name | Enter the name of the new stage. |
| Status | Enter the status label records should have while they are at this stage. |
| Stage Color | Use the color picker widget to select the desired color, or enter the color as a Hex code. |
| Click to close the dialog and cancel the new stage creation. | |
| Click to close the dialog, and update the stage with the new values. |
Deleting a Workflow Stage
![]() To delete a stage, click on the desired stage in the list on the left, then click on the Remove Stage trash can icon (C) at the top right.
To delete a stage, click on the desired stage in the list on the left, then click on the Remove Stage trash can icon (C) at the top right.
Demonstration Video
The following video outlines creating workflow stages and action buttons:
Next Steps
| Below are links to articles that cover the other main areas of creating a workflow: |
| Workflow Action Buttons |
| Workflow Security |
| Email Templates |
| Below are the links to the episodes of Building an Expense Reports App tutorial series that include descriptions of setting up a workflow: |
| Part 5 – Expense Reports App – Workflow |
| Part 6 – Expense Reports App – Security |
