Workflow is just another name for an approval or review process that a record might have to go through. A workflow stage is a step in the review/approval process where a record will wait for a user to take an action, such as approve, reject, or assign to a colleague.
Note: This page is about the new workflow user interface (UI), found on the Workflow New tab. The original workflow UI is still available for now, on the ‘Workflow Old’ and ‘Security Old’ tabs that follow it. The available features are similar, but a few of the latest minor features are only available via the new workflow UI.

Workflow Stages Example
As an example, let’s say a contract needs to be reviewed and approved by Legal and Finance, before being sent to the division VP for final approval. In this example, the workflow stages might be:
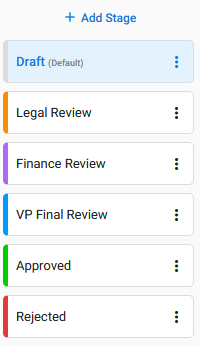
This workflow could be drawn in a diagram, such as shown below, where each blue box is a workflow stage and the arrows show how you can move between them:

Creating and Managing Workflow Stages
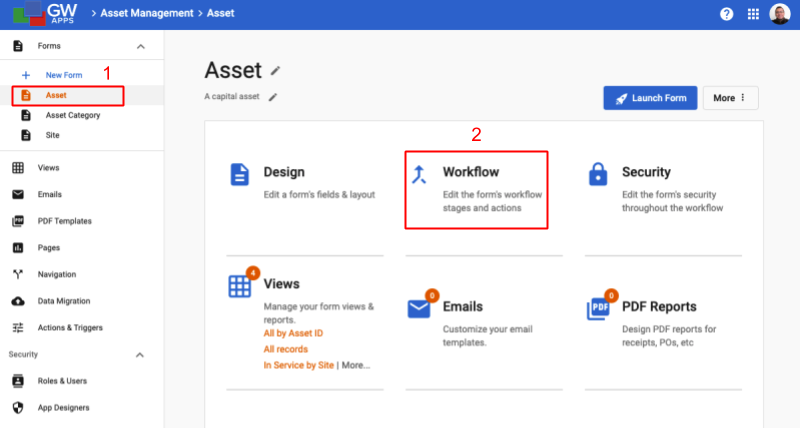
Workflow Stages are created and managed from the Workflow tab on the form design. To access the Workflow Stages of a form:
| Edit App > Click on the desired form’s tile (1) > Click ‘Workflow (2)’ |
 |
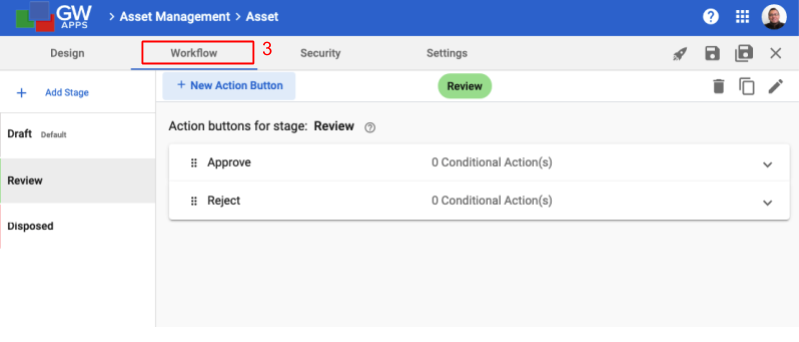
| If you are already in the Form Editor > Click on the Workflow tab (3) |
 |
On the workflow tab, you can create and manage the following:
- Create workflow stages, the steps in the review and approval process.
- Create workflow action buttons, the workflow activities a user can initiate by clicking on a button, such as approve.
- Specify security, who should be able to see or edit which form fields and workflow action buttons.
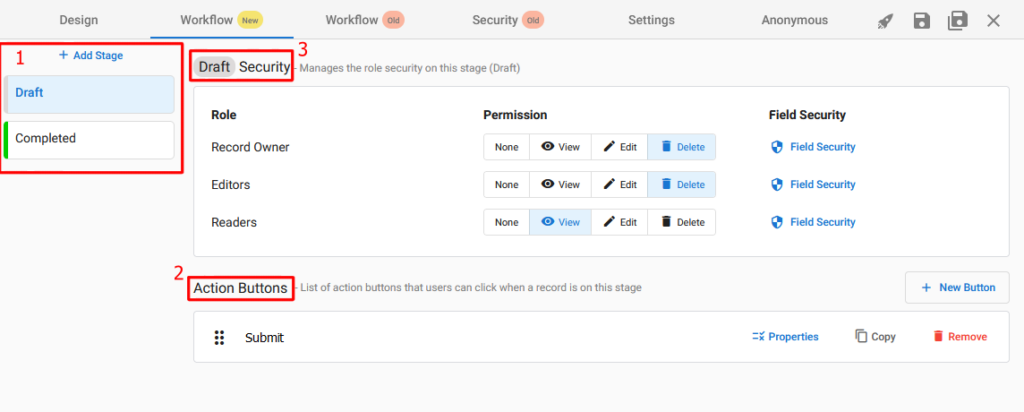
The Workflow tab can be broken down into three sections, to cover these three different aspects:
- Stages (1)
- Action Buttons (2)
- Security (3)
Workflow Stage Creation
You can add, remove and edit stages. The current workflow stages for the forms can be found on the left side of the Workflows tab. Initially there are two starter stages, Draft and Completed. These stages can have their settings edited and their names changed. The Completed stage can be deleted, but the Draft stage can’t be moved or deleted. (Instead, just rename it to what you want it to be.)
To create a new stage click the ‘+ Add Stage‘ button at the top of the stage list and the ‘Add Stage’ dialog box will open:
The new stage will always be added to bottom of the stages list, but it can be moved to a different place in the order, if required.
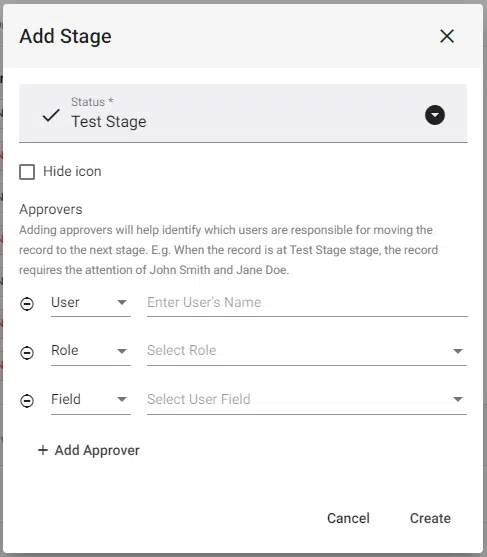
| Item | Description |
| Status | Enter the status label records should have while they are at this stage. This will also be the Stage name. |
| Icon | Click on the icon to the left of the status text to select an alternate icon image. |
| Stage Color | Click on the down arrow icon to the right of the status text to display the color picker widget to select the desired color, or to be able to enter the color as a Hex code. |
| Hide icon | Check this box the hide the icon from displaying to users. If ‘Hide Icon’ is selected, the icon will not display to the left of the status text. Note: It is not required, or even always recommended, to show the stage icons. Having some stages with icons and some without is not recommended. Using Icons that don’t clearly represent what the stage is supposed to be about just become visual noise and don’t really help. If you can find icons that are helpful to the users, then they can add some visual flair to your app. |
| Approvers | [Optional] Adding approvers will identify which users are responsible for moving the record to the next stage. E.g. When the record is at Draft stage, the record requires the attention of John Smith and Jane Doe. You can then show them as the responsible people in views and reports, via the Approvers system field. Add as many as necessary, though try to be as concise as possible, because users might follow up with the named people in regards to records at that workflow stage. Note: This setting has no affect on who who can see or take action of records at different workflow stages: That must be defined via form security. It is just to show users who is/are the currently assigned responsible people. |
| Click to close the dialog and cancel the new stage creation. | |
| Click to close the dialog, create the new stage, and be taken back to the Workflows tab. |
Managing Workflow Stages
To manage a workflow stage, select the three dots on the stage card in the stages list.
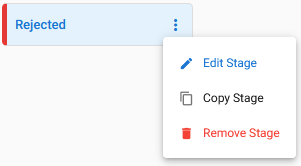
- Edit Stage – Will re-open the dialog box, enabling you to edit the stage status, icon, color and Approvers.
- Copy Stage – Will duplicate the stage action buttons and security settings. After selecting, a dialog box will open allowing you change the new stage’s name, color and icon.
- Remove Stage – Will delete the stage and prompt you to choose which other existing stage to move any records that are currently at the stage you are trying to delete.
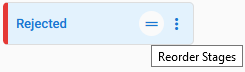
To Reorder Stages, hover your mouse cursor over a stage and click-and-drag the double-line icon:
Next Steps
| Below are links to articles that cover the other main areas of creating a workflow: |
| Workflow Action Buttons |
| Workflow Security |
| Email Templates |
| Below are the links to the episodes of Building an Expense Reports App tutorial series that include descriptions of setting up a workflow: |
| Part 5 – Expense Reports App – Workflow |
| Part 6 – Expense Reports App – Security |