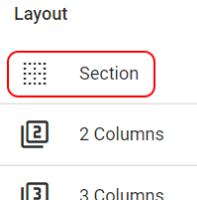
A blank form starts with a single empty section, but you can add more sections if desired. A section is just a grouping of fields with a visible outline on the form. As sections have titles and outlines, they can be used to visually split a form into different areas, which can help make the form easier to use. They also allow the designer to hide or make read-only a whole section, and all of its fields, instead of having to do that field by field. An App Designer can add new sections by dragging one from the palette of from elements on the left side, and dropping it where the new section is desired. Sections can also be dragged up and down the form to rearrange their order.
You can change which sections are shown to a specific user role at any workflow stage by editing the section’s display settings on the Security tab.
 |
To add a new section, drag the Section design element from the left-side palette and drop it where you would like the new section. New sections can be placed above or below existing sections, but not inside them, as it is not possible to nest sections. |
Form Section Controls
| Example of a New Section |
 |
You can change the name of a section, add or edit a section description, expand or collapse the section, and delete a section.
| Icon | Description |
| Copy – Copies the current section and all of its fields. The copy is placed under the current section. | |
Properties – Displays the right side properties panel, with the following settings about the currently selected section:
|
|
| Remove the current section and all of its components. | |
| Hide Section – Collapse section. Displays when the section is currently expanded. | |
| Show Section – Expand section. Displays when the section is currently collapsed. |
Form Sections Demonstration Video
The following video outlines creating sections and columns:
Next Steps
| Below are links to articles that cover the other general aspects of form design: |
| Form Editor Overview |
| Form layout part 2: Columns |
| In depth Field Features and Properties |
| As an example of the many field types available: Working with Text fields |
| Below are links to the two form building parts of the Building an Expense Reports App tutorial series: |
| Part 3 – Starting the Expense Reports Form |
| Part 4 – Completing the Expense Reports Form |

