When you create a new form, it has a single column for organizing the layout of fields and other form elements. To allow for more compact and efficient forms, you can also specify that an area of the form can have two, three or four columns. You can mix any combination of column layout elements in any order. The only restriction is that they can not be nested, so a column layout element can only be added above or below an existing one, not inside of one.
When a form with a column layout is used, tabbing between fields makes the cursor move down the current column to the end of the column, before moving across to the next column.
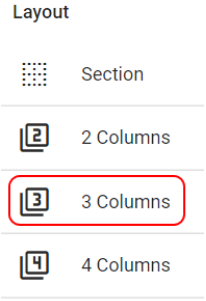 |
To add a new section, drag the desired Column Layout from the left-side palette and drop it where you would like the new columns on your form. New sections can be placed above or below existing columns, but not inside them.
In this example, the 3 column layout element has been highlight. |
Layout Columns Properties
There are only two properties that can be set for a column layout control: The column size options and conditional visibility. The table below shows the available column size options for each of the column layout elements.
| Number of Columns | Column Size Options |
| 2 |
|
| 3 |
|
| 4 |
|
Conditional Visibility
Conditional Visibility for a column control works exactly the same as it does for a field, except that it hides everything in the set of columns and not just the single field. Follow the link below to see how Conditional Visibility is set: Conditional Visibility
Layout Columns Demonstration Video
The following video outlines creating sections and columns:
Next Steps
| Below are links to articles that cover the other general aspects of form design: |
| Form Editor Overview |
| Form layout part 1: Sections |
| In depth Field Features and Properties |
| As an example of the many field types available: Working with Text fields |
| Below are links to the two form building parts of the Building an Expense Reports App tutorial series: |
| Part 3 – Starting the Expense Reports Form |
| Part 4 – Completing the Expense Reports Form |