The Appearance section in the platform settings lets you control the overall look of your platform, as well as create application categories so you to organize applications into groups on the applications dashboard.
| Item | Description |
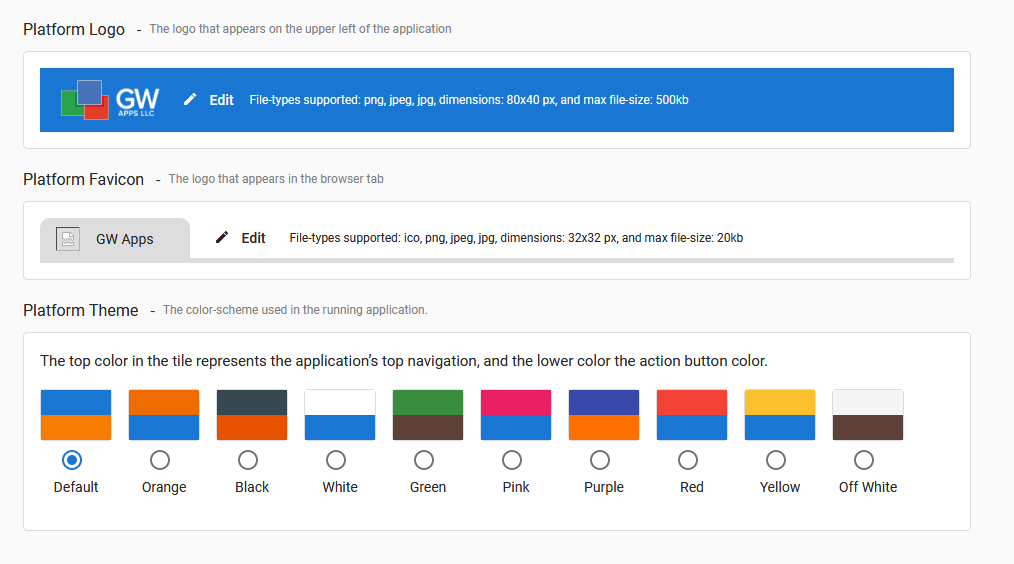
| Platform Logo | The platform logo appears in the top left corner of the platform header bar. Click on ‘Edit’ to change to displayed logo: Add your company logo or other suitable logo. (File-types supported: png, jpeg, jpg, dimensions: 80×40 px, and max file-size: 500kb). |
| Platform Favicon | The favicon displays inside the browser tab of any tab displaying a GW Apps. Click on ‘Edit’ to change to displayed logo: Add your company logo or other suitable logo. (File-types supported: ico, png, jpeg, jpg, dimensions: 32×32 px, and max file-size: 20kb). |
| Platform Theme | The platform theme is the overall color scheme of the platform. Each option shows two colors: The top color represents the platforms header color, and the bottom color represents the action button color. |
Apps Dashboard Grouping
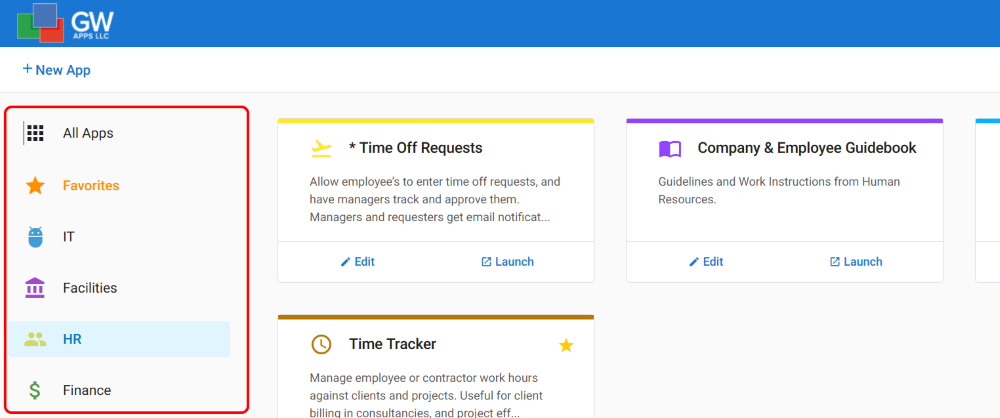
Dashboard Grouping helps to organize your Apps Dashboard, which is especially useful if there are a large number of applications in your GW Apps domain. The screenshot below shows how the App Categories display in the Dashboard Sidenav, and how it provides and organizational structure to help users find the right app.
| Item | Description |
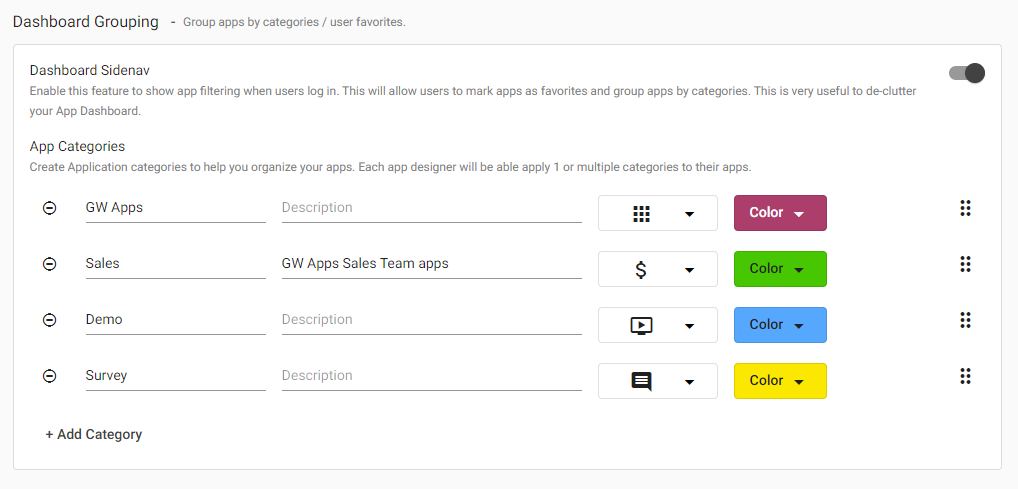
| Dashboard Sidenav | Enable this feature to show a left side navigator on the Apps Dashboard that shows the list of App Categories, plus ‘All Apps’ and ‘Favorites’. This can make it easier for users to find the apps they need to use. |
| App Categories | This is where you create the categories you want to use to organize your apps, along with the icon and color assigned to them. Click on ‘+ Add Category‘ to create a new category. Give it a name and an optional description (the description will not display on the sidenav), and choose an icon and color. To rearrange the order of the categories, click and drag the six-dot icon on the far right of the category. |
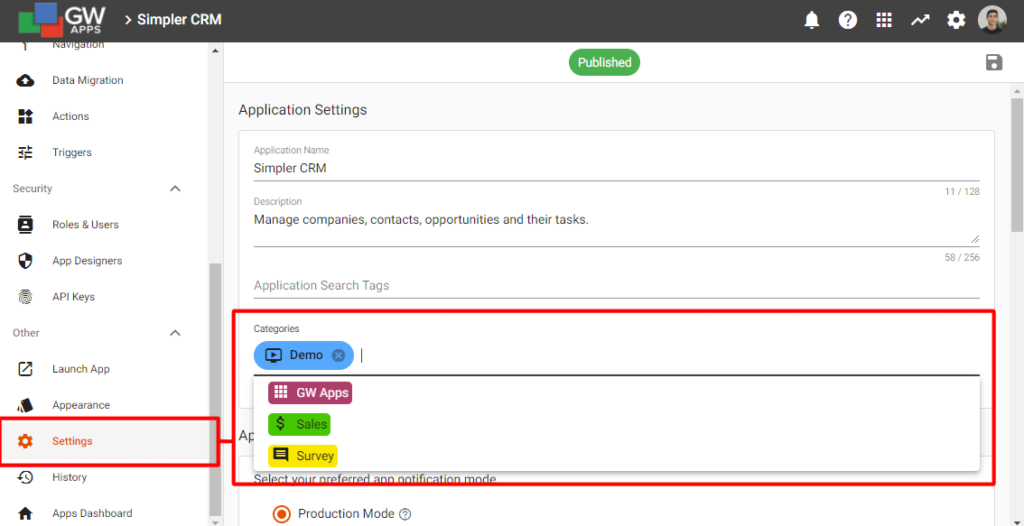
Assigning Categories to Applications
Once you’ve created your App Categories, you can assign one or more category(s) to an application by opening the application in edit mode, navigating to the ‘Settings’ section, and selecting the desired categories. The application will then display in the assigned categories on the Apps Dashboard.
Favorites
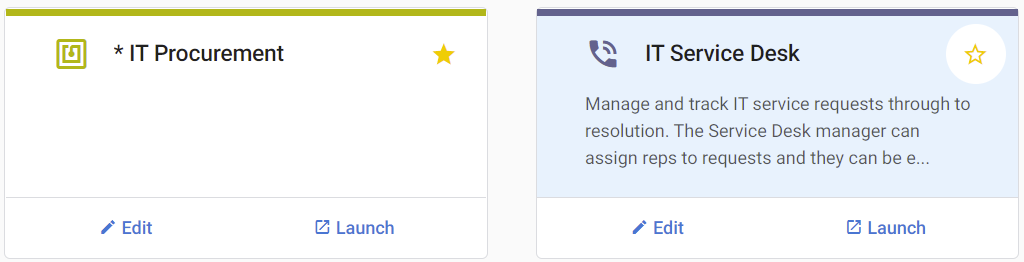
Once enabled, the Dashboard Sidenav feature will display your defined custom App Categories and the permanent ‘All Apps’ pseudo-category. It will also display the permanent ‘Favorites’ category. App Designers can not add an app to your Favorites, each user manages their own personal favorites list. To add a specific app to your personal favorites list, simply click on the empty gold start that appears when you hover over an app’s card/row on the Apps Dashboard (like IT Service Desk in the screenshot below). Once you click on it, the gold start will become solid gold in color (like IT Procurement in the screenshot below). To remove the app from your favorites, simply click on the solid gold star and it will become hollow again and be removed from your favorites.
 | Before leaving the Appearance section, make sure you save any changes you have made by clicking the floppy disk icon in the top right corner of the page. |
Additional Appearance Related Settings
The platform logo and favicon will be visible in all of your applications. However, each application also has its own color scheme and icon options. You can access these options from the Application Designer menu within your application, or when first creating your application.
Change the logo on your company login page in the Settings section of the platform settings.
You may also wish to add a company logo to all emails sent by your application workflows. You can do this by editing the template in the Email Layout section of the platform settings.