The Reports section of the Platform Settings allows you to create and configure table views for platform level reporting. These reports can display aggregate data from any applications on your platform. These views can be seen on the Reporting page.
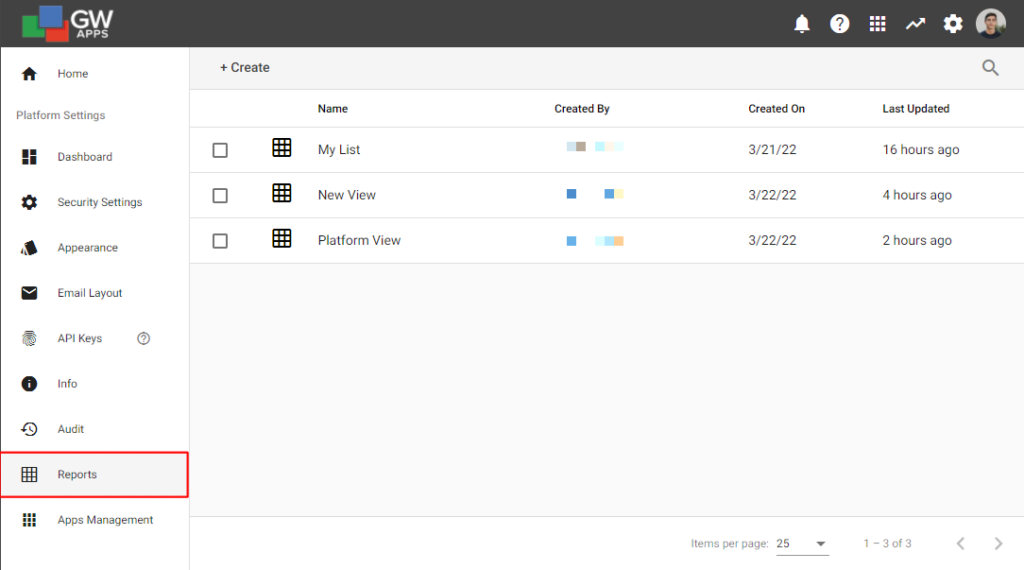
Create/Configure a Report (Platform View)
To create a new view simply click ‘+ Create‘ on the menu bar, give the view a name and an optional description, and press ‘Create‘.
Immediately after creating a view, a right-side panel will appear where you can configure the view’s properties. These options are similar to the app-level view properties, but with slightly reduced options and a difference in selecting column values to display (as we are selecting data from different apps).
The right-side properties panel has 4 tabs:

Columns
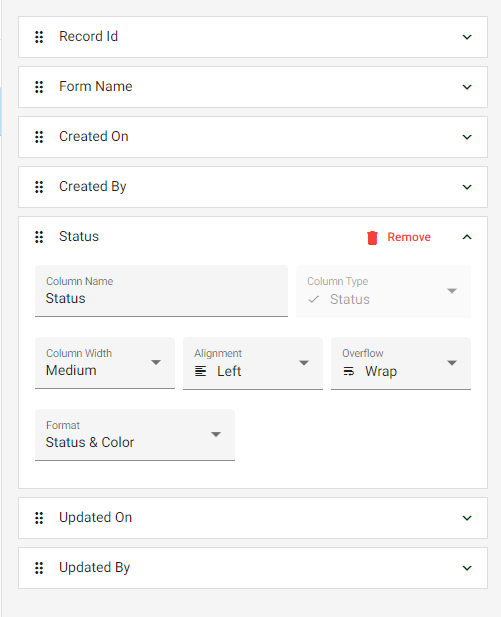
The Columns tab lets you manage/configure the fields that will display on your view. When you create a new Report, it will start will all of the system field columns already added. (Note: To add custom fields, ones that are not system fields and hence could be different or not available in each application, you must first add the forms you want the report to display via the Filters tab before trying to add your custom columns.)
| Item | Description |
| Clicking the down arrow on the right end of the column’s row, or actually anywhere in the middle of the row, expands/contracts the columns configuration details. | |
| When you hover you mouse over the column, you will see the ‘Remove” option. Click on it to delete the column from the report. | |
| To rearrange columns, click and drag the six-dot icon on the left end of a column. |
To add a column, select ‘+ Add Column‘ at the bottom of the column list and you will be prompted to choose a field type to add to the view:
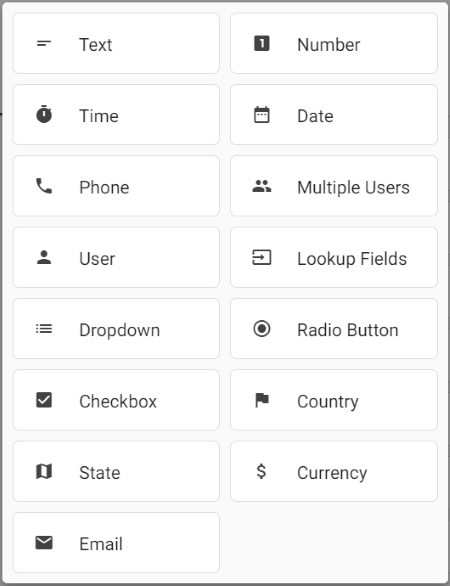
GW Apps will search the forms that the view is filtered by (chosen on the Filters tab) for fields that match the selected field type. You will then be able to assign one of the matching fields from each form to display in this column.
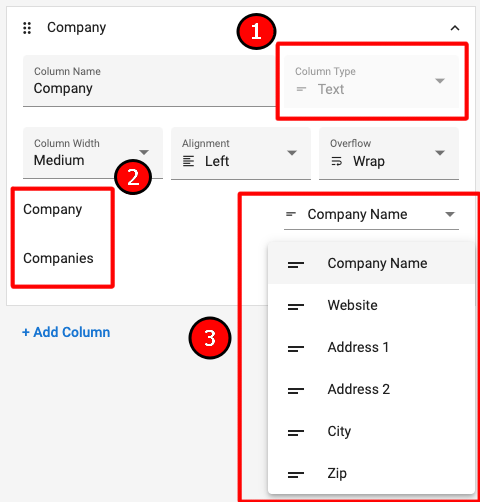
| Step | Description |
| 1 | Selected the required field type. (Note: As each column can only display data from one type of field, you may not be able to combine certain fields into a single column in the report.) |
| 2 | You will see a list of the forms the view is currently filtered by (chosen in the Filters tab). |
| 3 | Map Form Field – For each form, select the field whose data you want to display in this column. |
Filters
The Filters tab is used to configure/specify which records will display in the view.
| Item | Description |
| Filter by Forms | In a normal view in an application, a view will show all records from the related form, unless there is a field filter set. As Reports are not directly associated with a form, as normal views are, you need to define which form’s records it should display. |
| Search by Forms | Start typing the name of a form in this field and a drop-down list will display the names of forms that match what has been typed so far. Scroll up/down in the drop-down list or keep typing characters until you can see the desired form, then select it to add it to the list of forms displayed below the search field. (Note: The rows in the drop-down list with a grey background and an icon to the left represent the application the form is in. You can’t select the application, you must select the actual form name, which displays below the application and has a white background and no icon.)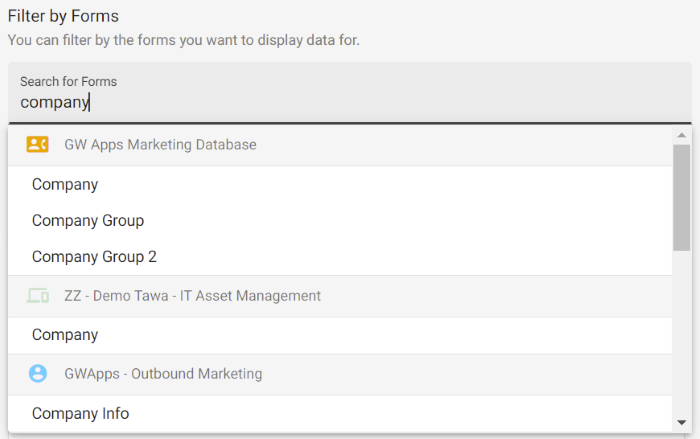 |
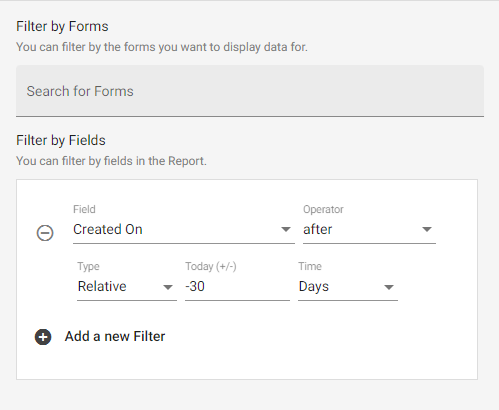
| Filter by Fields | Filter by Fields works exactly the same as filtering in a normal application view, and allows you to restrict the report to display only records that match specific conditions. When a new report is created it will have a default filter limiting the view to only records created in the last 30 days: You can remove this filter. (Read more about view filtering in this article.) |
Settings
The Settings tab is used to configure several configuration options. They work in the same way as the equivalent setting in a application view. We have linked to the detailed documentation for these settings in the application view support article :
- The Title/Description of the view (see details in this article).
- The pagination settings (see details in this article).
- The general appearance/formatting of the view (see details in this article).
Security
Any user designated as a Super Admin can see all platform views. The security tab is used to give other (non Super Admin) users access to see the view, by adding access for members of Shared Roles.
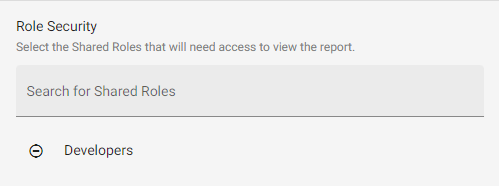
Start typing the name of the desired Shared Role in the ‘Search Shared Roles’ field and a drop-down list will appear that shows the Shared Roles that match what has been typed so far. Scroll up/down in the drop-down list or keep typing characters until you can see the desired Shared Role, then select it to add it to the list of Shared Roles displayed below the search field. All users within the selected Shared Roles will then see the ‘Reporting‘ icon on their platform header bar and be able to see the Report. They will not be able to make changes to the Report, and you need to be a Super Admin to be able to edit Reports.
Next Steps
After creating a view it will be visible on the ‘Reporting’ page. Learn more here: