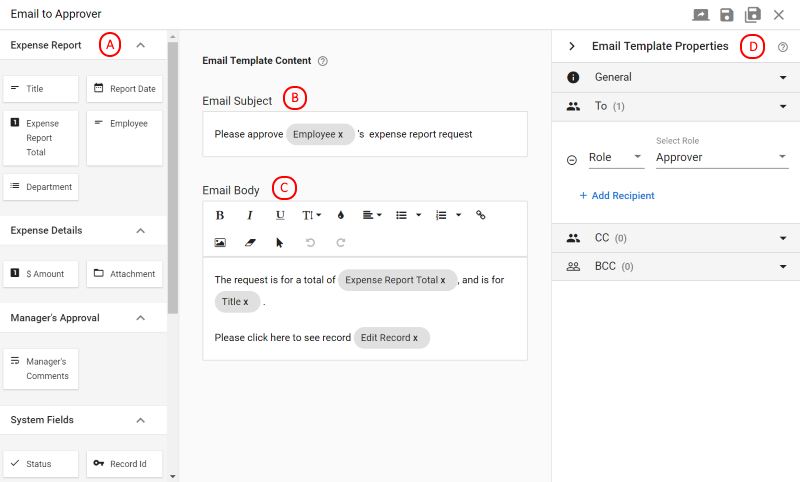
El editor de plantillas de correo electrónico le permite crear el texto del asunto y del cuerpo de su correo electrónico, y especificar los destinatarios y otras opciones del correo electrónico.
| Editor de plantillas de correo electrónico |
 |
| Área de redacción | Descripción |
| Paleta de campos disponibles (A) | Una lista de los campos de formulario y enlaces disponibles que pueden formar parte del mensaje de correo electrónico. Para añadir un campo o enlace al correo electrónico, arrástrelo desde la izquierda a las secciones de edición Asunto o Cuerpo. (Caerá exactamente donde el puntero de la flecha del ratón esté apuntando cuando suelte la tecla del ratón). |
| Asunto del correo electrónico (B) | Escriba el texto del asunto que desee, junto con los campos de la paleta de la izquierda. (No le recomendamos que incluya enlaces, ni más de dos o tres valores de campo, en el asunto del correo electrónico). |
| Cuerpo del correo electrónico (C) | El cuerpo también puede incluir texto, junto con campos y enlaces de la paleta de la izquierda. A diferencia del Asunto, el Cuerpo también puede incluir formato como listas de viñetas, efectos de fuente como negrita, cursiva y colores, tablas para ayudar a crear un diseño ordenado, e imágenes y enlaces URL personalizados. |
| Propiedades de la plantilla de correo electrónico (D) | Defina los destinatarios del correo electrónico, junto con algunos ajustes generales. (Vea más detalles en la siguiente sección). |
Gestión de los destinatarios de las plantillas de correo electrónico
| Gestión de los destinatarios |
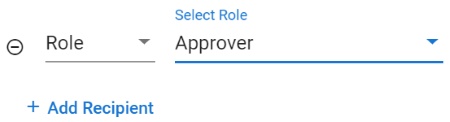 |
Los destinatarios de Para, CC y CCO se seleccionan exactamente de la misma manera, como se indica a continuación.
| Icono | Descripción |
| Haga clic para eliminar el destinatario asociado. | |
| Haga clic para añadir otro destinatario. |
Los destinatarios pueden definirse de tres maneras diferentes:
| Tipo de destinatario | Descripción |
| Papel | Seleccione el rol deseado de la lista proporcionada. |
| Usuario | Comience a introducir la dirección de correo electrónico del usuario deseado en el campo previsto y, a continuación, seleccione su dirección de correo electrónico completa en la lista que aparece. (Debe seleccionar el valor del correo electrónico de la lista para que se guarde. Además, sólo puede enviar un correo electrónico a los usuarios que figuran en la lista maestra de usuarios de GW Apps mediante la opción "Usuarios". Consulte el artículo Administración de la plataforma Gestión de usuarios: Usuarios, para más detalles). |
| Campo | Seleccione el campo deseado de la lista proporcionada. Sólo se mostrarán los tipos de campo Usuario, Usuarios múltiples y Correo electrónico del formulario actual. (Si no ve ninguna opción en la lista desplegable, es porque no tiene ningún campo de Usuario, Usuarios múltiples o Correo electrónico en el formulario actual. Los campos de tipo Correo electrónico pueden contener cualquier dirección de correo electrónico con formato válido, mientras que los campos Usuario y Usuarios múltiples sólo pueden contener usuarios que figuren en la lista maestra de usuarios de GW Apps). |
Estos pueden ser utilizados en cualquier combinación, por ejemplo, Para podría incluir dos roles, y CC tiene un rol, tres usuarios y un campo.
Propiedades de las plantillas de correo electrónico - Generalidades
| Configuración general |
 |
| Artículo | Descripción |
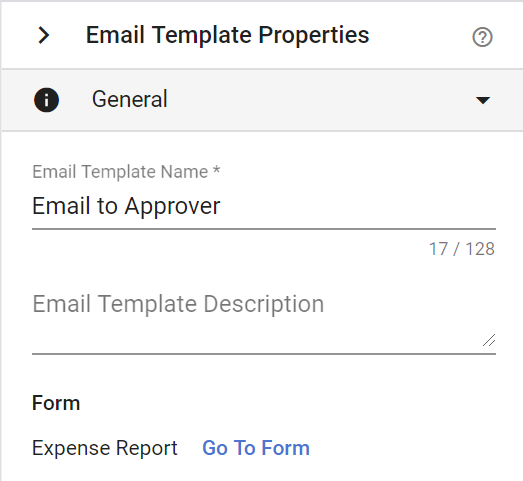
| Nombre de la plantilla de correo electrónico | El nombre de esta plantilla de correo electrónico. (El nombre de la plantilla no se muestra a los destinatarios del correo electrónico, sólo lo ven los diseñadores de la aplicación). |
| Descripción de la plantilla de correo electrónico | [Opcional] Una descripción más larga si el nombre de la plantilla no es suficiente para identificar completamente el uso de esta plantilla. (La descripción de la plantilla no se muestra a los destinatarios del correo electrónico, sólo la ven los diseñadores de la aplicación). |
| Formulario | Sólo lectura] Muestra el nombre del formulario asociado a esta plantilla de correo electrónico. El enlace Ir al formulario abrirá el formulario en el Editor de formularios. |
Propiedades de la plantilla de correo electrónico - Remitente
| Configuración del remitente |
 |
| Artículo | Descripción |
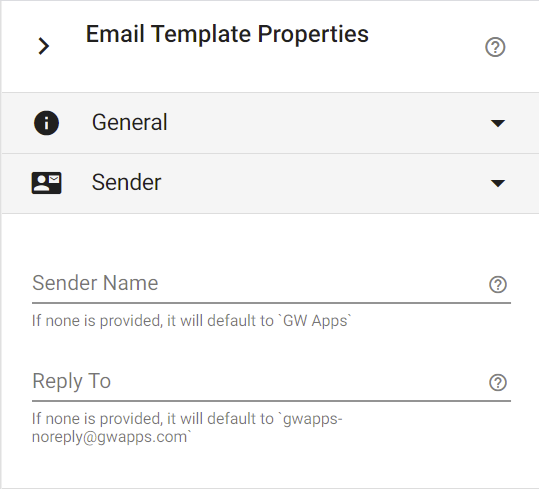
| Nombre del remitente | [Opcional] El nombre que aparecerá como remitente del correo electrónico. (Los correos electrónicos aparecerán como enviados por 'GW Apps' si no se proporciona un nombre de remitente). |
| Responder a | [Opcional] La dirección de correo electrónico que se utiliza si un destinatario responde al correo que ha recibido. (Si no se proporciona una dirección de correo electrónico de respuesta, las respuestas se enviarán a 'gwapps-noreply@gwapps.com', que es un callejón sin salida). |
Propiedades de las plantillas de correo electrónico - Botones
| Configuración de botones |
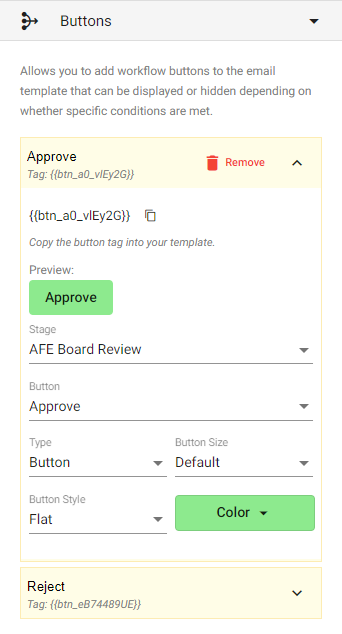 |
Los botones permiten a los destinatarios del correo electrónico actuar sobre los registros directamente desde el cuerpo del mensaje.
| Artículo | Descripción |
| Etiqueta | Copie y pegue la "Etiqueta" generada en el cuerpo del correo electrónico donde desea que aparezca el botón. |
| Vista previa | Una vista previa visual de cómo aparecerá el botón en el correo electrónico. |
| Escenario | Etapa en la que se encuentra el botón de acción deseado. |
| Botón | El botón deseado de la Etapa seleccionada. |
| Tipo | Tipo determina cómo aparecerá el "Botón" en el correo electrónico. Hay dos opciones: "Botón" y "Enlace". El primero se mostrará como un botón, el segundo como un hipervínculo. |
Nota: El botón sólo se mostrará cuando el registro se encuentre en la etapa asociada a la acción. Por ejemplo, si selecciona la etapa "Borrador" y el correo electrónico se envía cuando el registro se encuentra en la etapa "Aprobado", el botón estará oculto.
Una vez enviado el email, el registro al que está asociado puede ser movido a otra etapa del flujo de trabajo. En esta situación, el botón de acción del correo electrónico no se ocultará, ya que no puede ver el registro para saber que ha cambiado de etapa de flujo de trabajo. Sin embargo, aunque el botón esté visible, en realidad no funcionará, ya que GW Apps verificará la acción solicitada y la identificará como no válida en la etapa del flujo de trabajo en la que se encuentra actualmente el registro, y no ejecutará la acción. El botón simplemente abrirá el registro, pero no lo modificará en modo alguno.
Propiedades de las plantillas de correo electrónico - Archivos adjuntos
| Configuración del remitente |
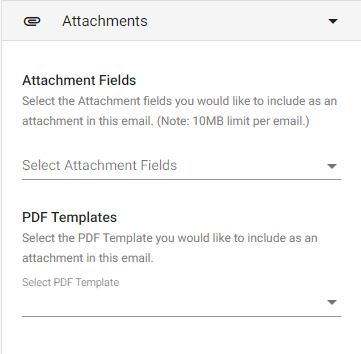 |
| Artículo | Descripción |
| Seleccionar campos adjuntos | Seleccione uno o varios campos Adjuntos en el formulario asociado. Los archivos cargados desde los campos Adjuntos se adjuntarán automáticamente a la plantilla de correo electrónico, siempre que el tamaño total del archivo no supere los 10 MB. (Se trata de una limitación del proveedor de correo electrónico. Mientras que Google permite 25MB, otros proveedores tienen un límite de 10MB). Si el tamaño de un archivo es superior a 10 MB, el sistema lo ignorará. Si hay varios archivos, el sistema sólo adjuntará hasta 10 MB, y el resto de los archivos se ignorará. |
| Seleccionar plantilla PDF | Seleccione el nombre de una plantilla PDF. Cuando se genere un correo electrónico, se creará un PDF utilizando esa plantilla y el registro actual y se adjuntará al correo electrónico. (Sólo se mostrarán en la lista las plantillas PDF asociadas al mismo formulario que la plantilla de correo electrónico actual. Si no existe ninguna, se mostrará un mensaje que lo indique). |
Próximos pasos
| A continuación encontrará enlaces a artículos que cubren las otras áreas principales de la creación de un flujo de trabajo: |
| Etapas del flujo de trabajo |
| Botones de acción del flujo de trabajo |
| Seguridad del flujo de trabajo |
| A continuación se encuentran los enlaces a los episodios de la serie de tutoriales sobre la creación de una aplicación de informes de gastos que incluyen descripciones de la configuración de un flujo de trabajo: |
| Parte 5 - Aplicación de Informes de Gastos - Flujo de trabajo |
| Parte 6 - Aplicación de informes de gastos - Seguridad |