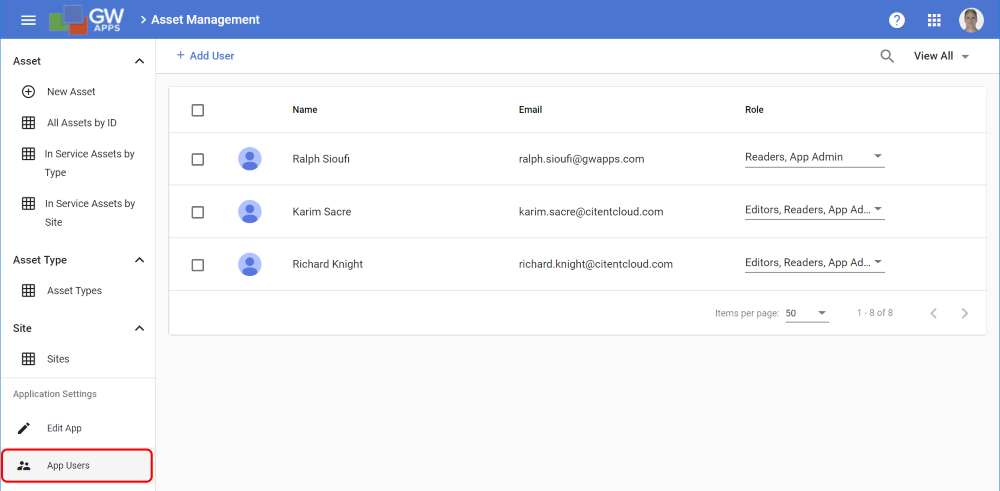
Users are not created within an application in GW Apps, but we do need to specify who can use an application and what capabilities each user will have in that application. The first step is to add the desired users to the application using the App Users screen.
Unlike the other application design or configuration options, the App Users screen is visible while you are using the application and not after clicking on ‘Edit App’. To access the App Users screen, go to: Application Settings > App Users.
| App Users Screen |
 |
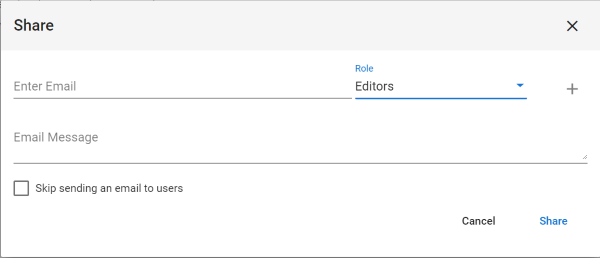
To add a new user to the application, click on the + Add User button at the top of the users list. You will then see the following dialog:
| Share (Add User) Dialog |
 |
| Item | Description |
| Enter Email | Start typing the name or email address of a valid user. A drop-down list will show the matching names: Select the required name once you see it in the drop-down list. The user has to already be a registered user on the platform, for them to be added to an application. |
| Role | Select the initial role the user should be added to. The user can be assigned additional roles after they are added to the app. |
| Email Message | By default, the selected user will receive an email message alerting them that they have been added to the users for this application. The basic email contains all the requited information, but if you would like to add a specific message to this email, add the text to the Email Message field. |
| Skip sending an email to users | If you don’t want the selected user to receive an email message, then check the ‘Skip sending an email to users’ option. |
App Users Demonstration Video
The following video outlines assigning application users:
Next Steps
| Below are links to articles that cover the other main areas of application security: |
| Security: App Designers |
| Security: Roles & Users |
| Below is the link to the episode of Building a Task Management App tutorial series that include descriptions of setting up security: |
| Part 6: Building a Task Management App – Security |