This section displays all users with access to your organization’s platform, and allows you to add, import, and suspend users, as well as manage their access to applications.
Adding Users
| Item | Description |
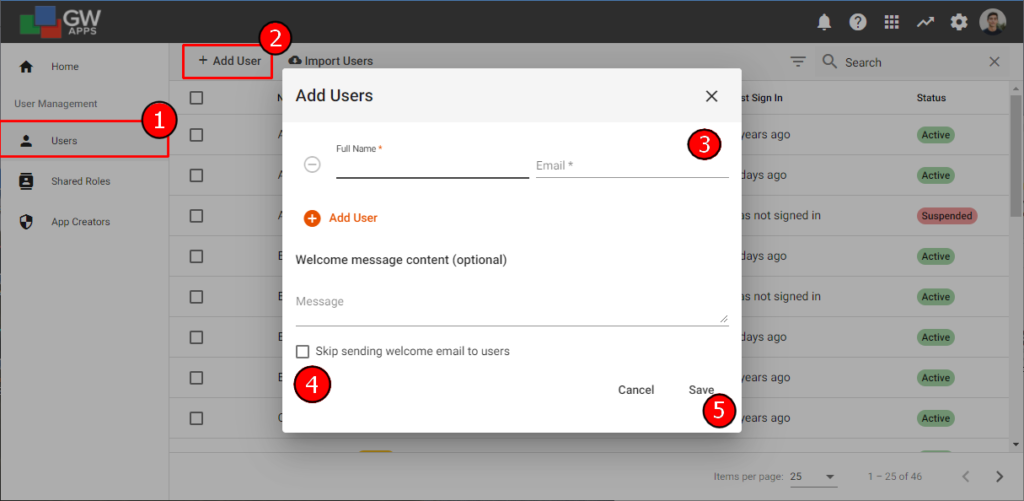
| Users (1) | To see the list of users who are known to the platform, and can log in (unless they are marked as ‘Suspended’), select ‘Users’ from the navigator. |
| + Add User (2) | To add users individually, select ‘+ Add User’ on the menu bar. In the pop-up window, you will be prompted to enter their Full Name and Email (3). To add more than one user at a time, click on ‘+ Add User’ and you will see an additional row to enter another user. You may then choose whether or not to send a custom welcome email to the user(s), or skip sending the email (4). Finally, click ‘Save’ (5) and your user(s) will be added. |
Importing Users
If you need to add a large number of users to GW Apps, it can be quicker to use the Import Users feature. First, you need to compile the required users information into a CSV file with two columns: Full name and email address. Clicking on the ‘Import Users’ button on the Menu Bar will display the following pop-up dialog:
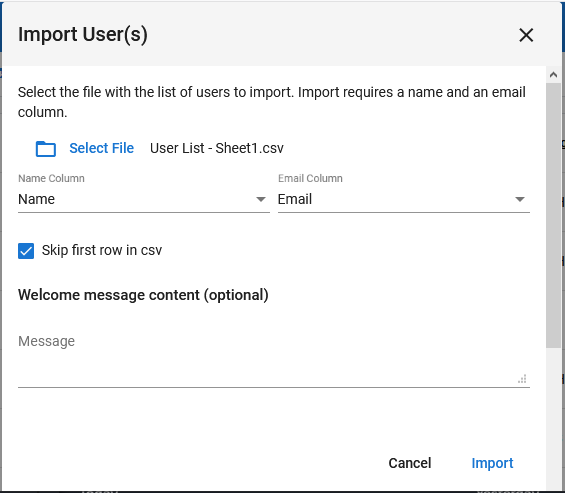
After selecting the file, choose the associated Name and Email columns on your CSV file. (This column mapping step allows you to use a file with more than just the two required columns in, if you already have one with additional columns in.) You may then write a custom welcome message, or you can skip sending the welcome message. Finally, click ‘Import’ on the bottom right to add the users.
After a user is added, they will be able to login to your platform with the email you entered by going to: https://app.gwapps.com/login.
Removing (Suspending) Users
GW Apps does not allow you to actually remove a user, you will ‘Suspend’ them instead. Suspended users will remain in the user list, and their status will change to ‘Suspended‘. A user that is suspended behaves like they were removed from the platform, i.e. they can’t access any part of the platform any more. However, all of their their access permissions are kept, so if they ever need to be reactivated, they will again have access to the same apps and roles as before.
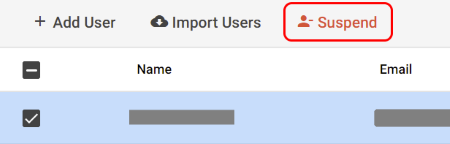
To suspend a user, select the checkbox next to their name in the user list and click on the ‘-Suspend‘ button that appears on the menu bar. You may select multiple users at the same time to be suspended.
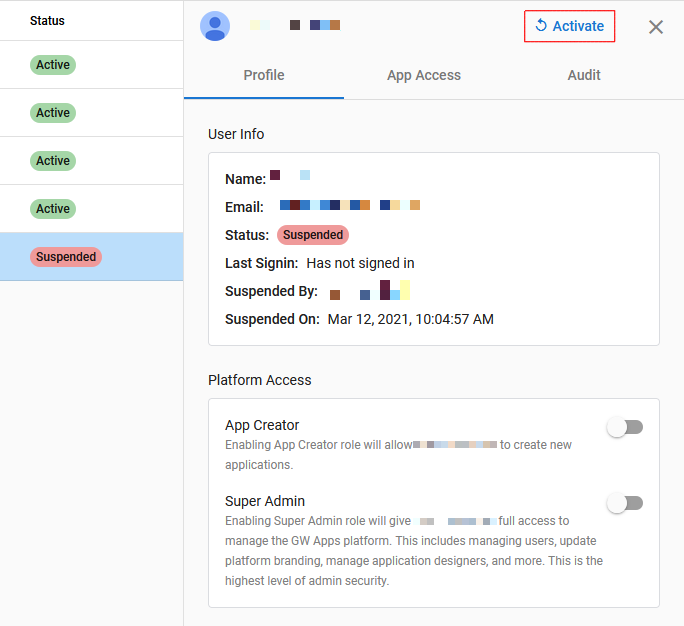
A suspended user can be reactivated by selecting them and then selecting the ‘Activate‘ button on the menu bar (where the suspend option is for Active users). They can also be reactivated from the right-side panel that appears when you select them.
Additional User Management Options
Selecting a user will display a right-side panel with additional information and management options for the users.
The panel is divided into three tabs: Profile, App Access, and Audit.
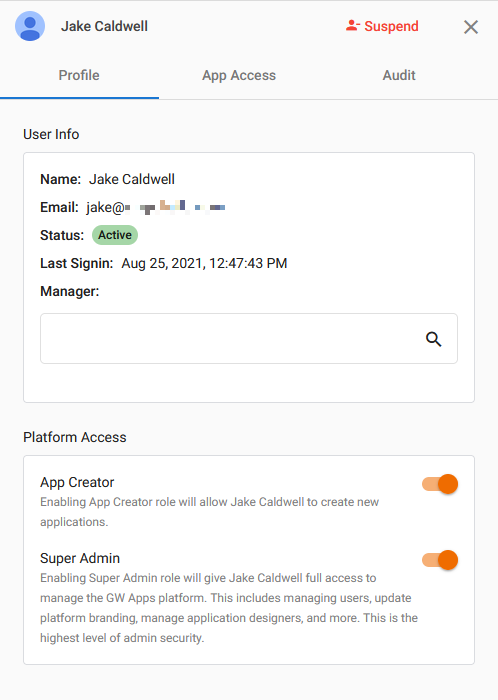
Profile Tab
The Profile tab displays general information on the user, and also gives you the ability to manage their platform access.
This is also where you assign a Manager to a User – a user’s manager can be referenced/called into applications.
You may also suspend from this panel, and designate the user as an App Creator or Super Admin.
| Item | Description |
| Suspends the selected user, so they can no longer log in to GW Apps. | |
| App Creator | Enable the selected user to create new applications. It does not give the user rights to edit any existing applications, just create new ones. |
| Super Admin | Allows the selected user access to use all features of Platform Admin. This is the highest level of access in GW Apps. |
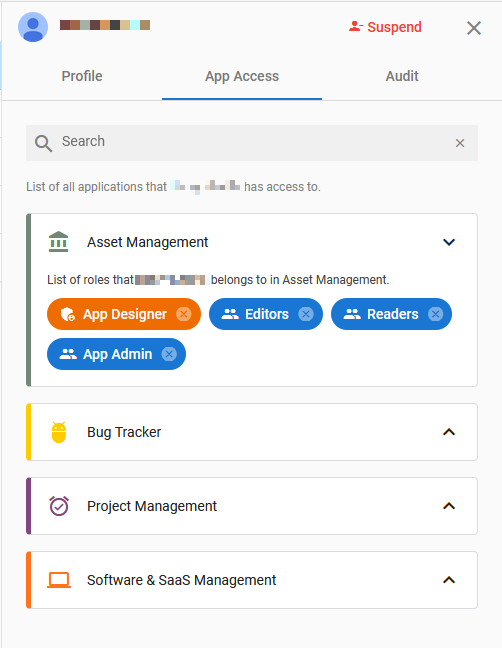
App Access Tab
The App Access tab displays all apps that the user has access to. It also displays their role(s) in each app, and gives you the option to remove them from roles defined within the application. (Note: Users still cannot be removed from system roles (e.g., All Domain Users)).
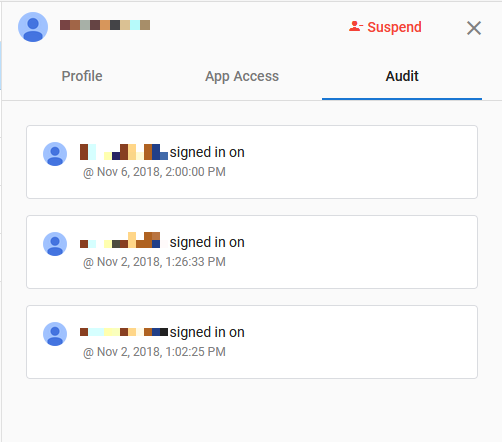
Audit Tab
The Audit tab will display the history of login in events for the selected user.
Next Steps
After a user has been added to the platform, you may then add them to applications. For more information, click here.
You may also assign App Creators and Super Admins in the ‘App Creators’ section. For more information, click here.
Shared Roles are global roles that can be populated in the platform settings and then added to any of your applications. For more information, click here.