Roles & Users are in integral part of all applications. Roles are a bit like groups, and are a key part of how you control who can do what in an application. Abilities like creating a new record, seeing and clicking a workflow action or seeing a view, are all controlled by roles. You add people into a role, and then tell GW Apps which role can see or do each specific ability.
There are three kinds of roles:
- Managed Roles – Managed roles have their users directly managed from the Roles & Users screen. The members of the role are fixed, unless somebody edits the role members from the Roles & Users screen. This also means that the role defines the same people, no matter which record it is related to.
- Dynamic Roles – Dynamic roles do not have their users directly managed from the Roles & Users screen. You can’t see who is a member of the role, as the role has no fixed members. Using a workflow action, each dynamic role can have it’s members set specifically for that record. Hence, a dynamic will usually have a different set of members for each record in the app. They are used for allowing for such workflow as having only the user’s managed notified and able to edit and approve a record once it is submitted, rather than a set group of managers for all requests.
- Shared Roles – Shared roles and like Managed roles, but they are defined in Platform Administration, and can be used in any application. That way, you can have a VPs role and/or HR Managers role that you configure once, but can then use in multiple apps. It provides role management efficiencies and control, rather than new app capabilities.
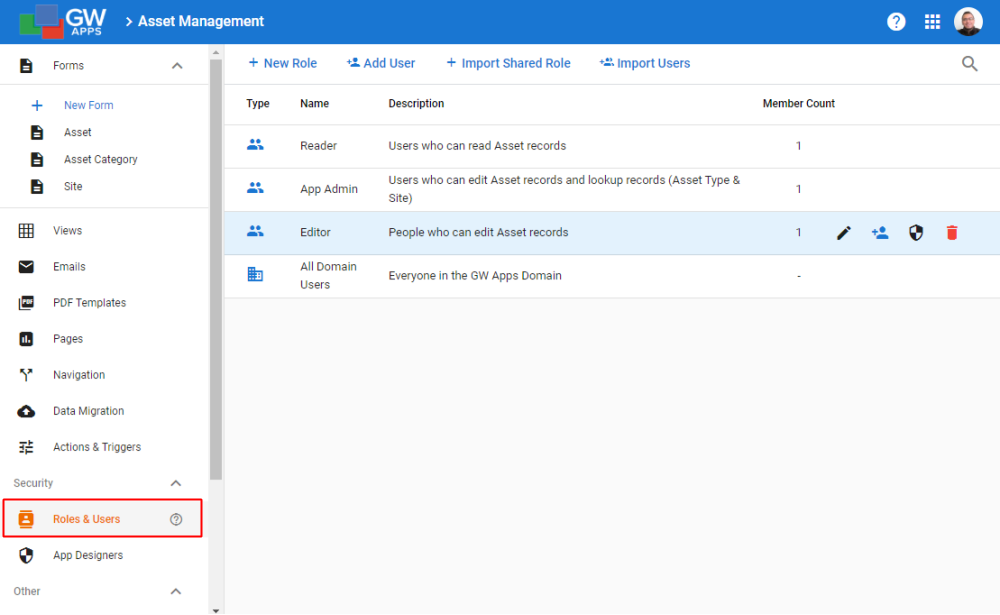
To access the Roles & Users screen, go to: Edit App > Security > Roles & Users.
| Roles & Users Screen |
 |
Managing Roles & Users
| Roles & Users – Details |
 |
| Item | Description |
| Allows you to create a new role in the app. | |
| Allows you to add a user to the app and select a single initial role for them. The user has to already be a registered user on the platform, for them to be added to an application. | |
| Allows you to import a role that has been defined by your Platform Admin. Shared roles are managed centrally and are available to be used in each app. Above, ‘All Domain Users’ is an example of a Shared Role. | |
| Allows you to import multiple users and assign them to a role in one step. A CSV file containing the required users email addresses must be available. The file may contain other columns as the dialog will allow selection of the correct column. | |
| Click to edit the associated role. This icon shows as greyed out and is not clickable for Shared roles. | |
| Click to manage the members of the associated role. Opens a right-side properties panel to allow member management. This icon shows as crossed out and is not clickable for Dynamic and Shared roles, as their members are managed other ways. (See Role Members Panel section below for details.) | |
| [Manual and Dynamic roles only] Click to delete the associated role. | |
| [Shared roles only] Click to Unlink the associated role. This removes the shared role from the application. It does not delete the actual shared role from the platform. | |
| Click to see where in this application the associated role is used. Opens a right-side properties panel to allow reviewing of the roles usage. (See Role Permissions Panel section below for details.) |
Role Members Panel
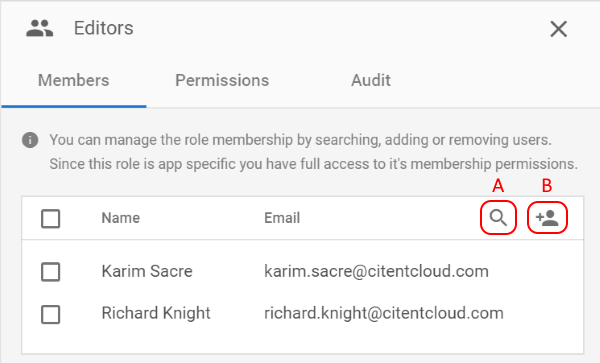
| Role Members Panel |
|
| Item | Description |
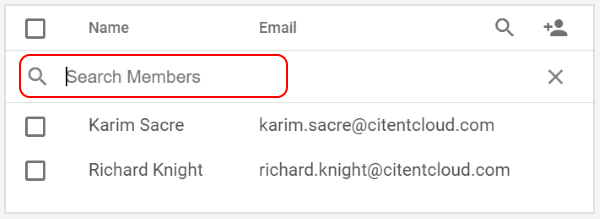
| Search Members – Clicking on the spyglass (A), will display the Search Members field above the members list, as show in the second screenshot. Start typing a users name and the members list will filter to show only the matching names. | |
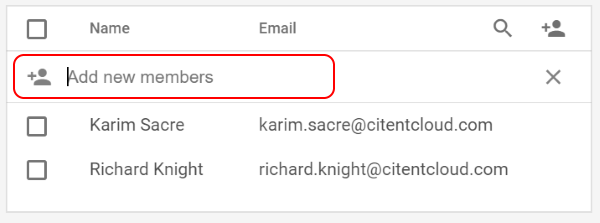
| Add new members – Clicking on the head (B), will display the Add new members field above the members list, as show in the third screenshot. Start typing the name or email address of a valid user. A drop-down list will show the users that match what has been typed so far: Select the required name once you see it in the drop-down list. The user will be added to the role’s members. |
Role Permissions Panel
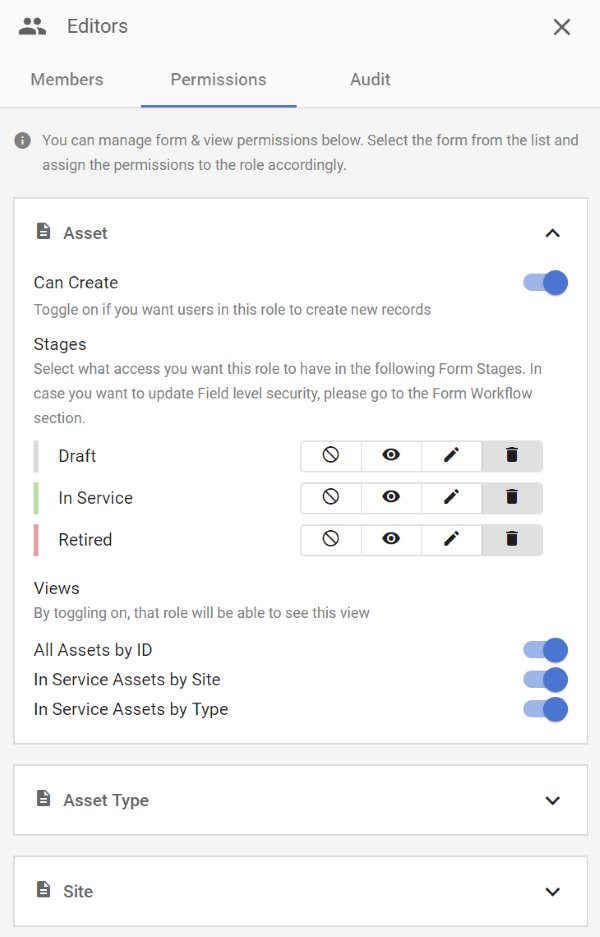
| Role Permissions Panel |
 |
| Item | Description |
| Can Create | If this role is allowed to create new records with the selected form. (In the screenshot shown above, and Editors is the name of the selected role. Asset, Asset Type and Site are the names of the three forms in the example app. They display as expandable tiles in the Permissions panel.) |
| Stages | Shows the workflow stages of the selected form, and what overall permission level this role has for that workflow stage. |
| Views | Shows the views of the current application, and if this role can view that view. |
Creating New Roles
To create a new role, click on the + New Role button at the top left of the page. You will then see the following dialog:
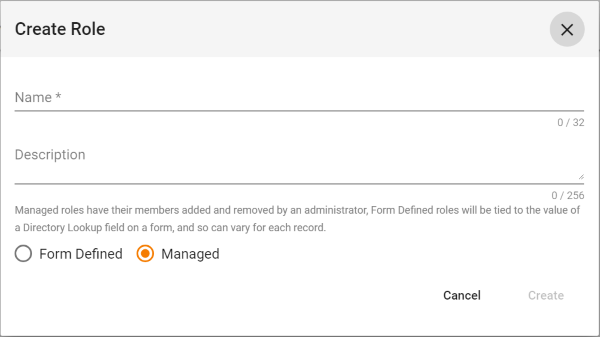
| Create Role Dialog |
 |
| Item | Description |
| Name | The name for the new role. Make it short but descriptive, such as Editors, Sales Managers or Approvers. |
| Description | [Optional] If desired, add a longer description of the roles purpose or membership. |
| Managed | A Managed role is like a normal email group: Somebody will add and remove members of the role manually. |
| Form Defined (Dynamic) | A Form Defined, or Dynamic, role has no fixed members. Instead its members will will be looked up from the value of a specified Directory Lookup field on a form. This way the role can have different members for each record. For example, it could be the department manager of the record’s originator (assuming that information was available in the application). |
Adding Users (Share)
To add a user to this application, click on the + Add User button. You will then see the following dialog:
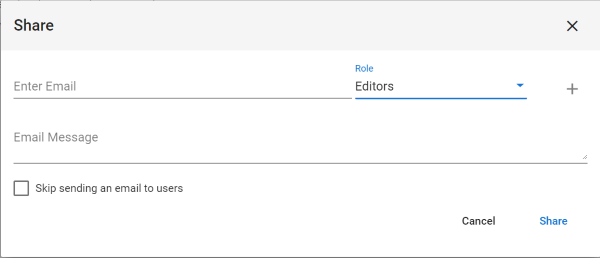
| Add User (Share) Dialog |
 |
| Item | Description |
| Enter Email | Start typing the name or email address of a valid user. A drop-down list will show the matching names: Select the required name once you see it in the drop-down list. |
| Role | Select the initial role the user should be added to. The user can be assigned additional roles after they are added to the application. |
| Email Message | [Optional] By default, the selected user will receive an email message alerting them that they have been added to the users for this application. If you would like to add a specific message to this email, add the text to the Email Message field. |
| Skip sending an email to users | [Optional] If you don’t want the selected user to receive an email message, then check the ‘Skip sending an email to users’ option. |
Importing Users
You can also bulk import users in to the app. To use the Import Users wizard, click on the + Import Users button. You will then see the following dialog:
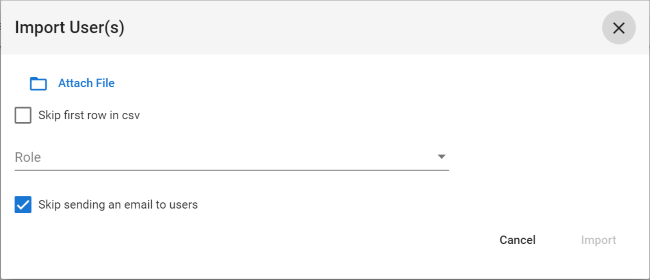
| Import Users Dialog |
 |
| Item | Description |
| Attach File | Click on this button to select the desired CSV file. Only files with a “.csv” file extension will be shown in the selection dialog. |
| Skip first row in csv | [Optional] If the CSV file has a top row header with text labels to identify the contents of the columns, select this option so the header label is not imported. |
| Role | Select the initial role the user(s) should be added to. The user(s) can be assigned additional roles after they are added to the application. |
| Email Message | [Optional] By default, the selected user will receive an email message alerting them that they have been added to the users for this application. If you would like to add a specific message to this email, add the text to the Email Message field.
(As the ‘Skip sending an email to users’ option is selected by default for the import dialog, you will not see the Email Message field until that option is cleared.) |
| Skip sending an email to users | If you don’t want like the selected user to receive an email message, then check the ‘Skip sending an email to users’ option. |
Roles & Users Demonstration Video
The following video outlines creating workflow stages:
Next Steps
| Below are links to articles that cover the other main areas of application security: |
| Security: App Users |
| Security: App Users |
| Below is the link to the episode of Building an Expense Reports App tutorial series that include descriptions of setting up security: |
| Part 6 – Expense Reports App – Security |