Workflow is a key aspect of many applications built in GW Apps. Workflow is just another name for an approval or review process that a record might have to go through. This page will teach you how to navigate the workflow tab and begin creating workflows for your applications.
Note: This page is about the New Workflow UI Overhaul. The old Workflow UI is still available–the new UI is accessible using the New Workflow tab on the form editor, and the old Workflow and Security tabs follow it. The available features of the new UI are identical to the old UI, but this new UI is designed to be easier to navigate and manage by combining Workflow and Security in the same tab. These changes will become the standard in the future, but you can begin learning how to navigate the new UI now.
Workflow Tab
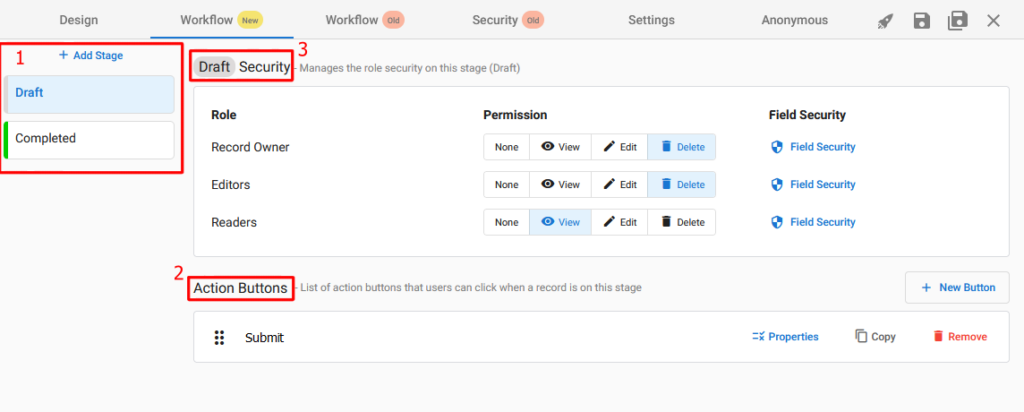
The Workflow tab can be broken down into three sections:
- Stages (1)
- Action Buttons (2)
- Security (3)
Workflow Stages
A stage is simply a step or status for your records. For example, this could be a step in a review/approval process where a record will wait for a user to take an action, such as approve, reject, or assign to a colleague. Or, perhaps you’re managing assets and need to know which assets are in service and which are out of service.
Example: Let’s say a contract needs to be reviewed and approved by Legal and Finance, before being sent to the division VP for final approval. In this example, the workflow stages might look like this:
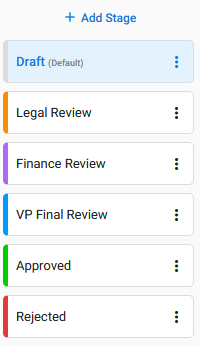
This workflow could be drawn in a diagram – each blue box is a workflow stage and the arrows show how you can move between them:

Create Workflow Stages
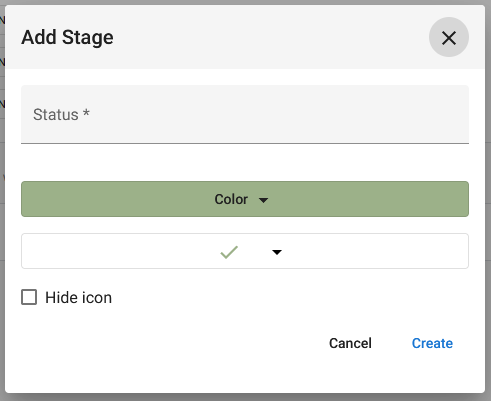
To create a new stage click the ‘+ Add Stage‘ button at the top of the stage list and the ‘Add Stage’ dialog box will open:
Status is the title of the stage, and you may also choose a color and icon for your stage. Or, you can check the ‘Hide icon‘ box to only have a color. Finally, click ‘Create‘ and your stage will be added to the stage list.
Manage Workflow Stages
To manage a workflow stage, select the three dots on the stage card in the stage list.
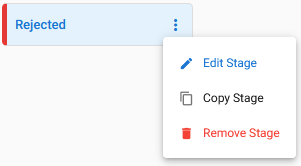
- Edit Stage will re-open the dialog box, enabling you to edit the stage name, color and icon.
- Copy Stage will duplicate the stage action buttons and security settings. After selecting, a dialog box will open allowing you change the new stage’s name, color and icon.
- Remove Stage will delete the stage and prompt you to choose where to relocate any records that are currently in the stage.
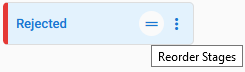
To Reorder Stages, hover your mouse cursor over a stage and click-and-drag the double-line icon:
Workflow Action Buttons
Action buttons are generally used to move a record through a workflow. However, you can also use them to create and update records, generate PDFs, send emails, and more.
Note: Workflow action buttons are associated with a specific workflow stage. You must define your Workflow Stage before you can add any workflow action buttons to it.

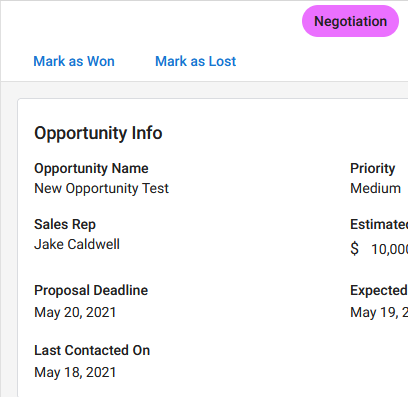
In the above example, when a record is in the ‘Negotiation‘ stage, a user may Mark as Won, or Mark as Lost. These action buttons will change the record stage to ‘Closed – Won‘ and ‘Closed – Lost‘, respectively.
These action buttons will display on all records in the ‘Negotiation‘ stage. However, you may hide action buttons by configuring the button security (more on that below):
Example: As another example, at a ‘Manager Review‘ stage there might be ‘Approve’, ‘Reject’ and ‘Return to Submitter’ action buttons, and hitting ‘Approve’ might move the record to the ‘VP Review‘ stage and send an email to the VP notifying them of the need for review.
Create Action Buttons
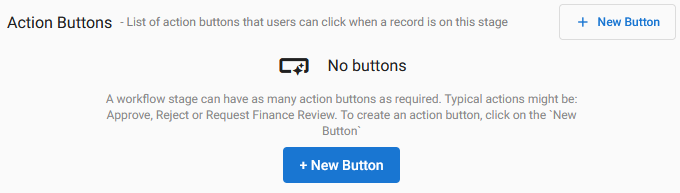
To add an action button to a stage, select the stage and click ‘+ New Button‘. Then, in the pop-up dialog box simply give the button a name and select ‘Create‘ to add the button.
Manage Action Buttons

Click and drag the six (6) dots on the far left of the action button to reorder. On records, the buttons will display from left to right, starting with the top button in the list.
You can edit the button name by selecting it here. This is one of two places you can edit the name – the other being the Format section of the button properties.
Properties opens the button properties.
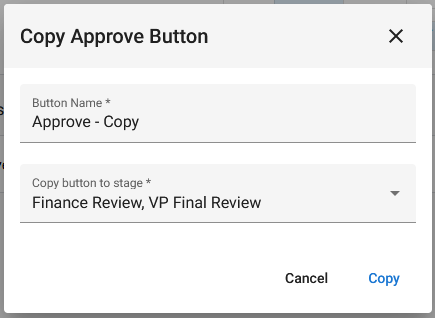
Copy will duplicate the button and all of it’s properties, and allow you to add it to any stage(s), including the current stage.
Remove deletes the button.
Action Button Properties

After creating an action button, the button properties panel will immediately open on the right – this is where you configure and customize your button.
The configuration options are broken down into four tabs:
- Actions: Define the actions to run when the button is clicked.
- Security: Configure button visibility.
- Dialog: Confirmation Dialog toggle/settings.
- Format: Change the appearance of the button.
Actions
There are two classes of actions: Conditional Actions, and Default Actions.
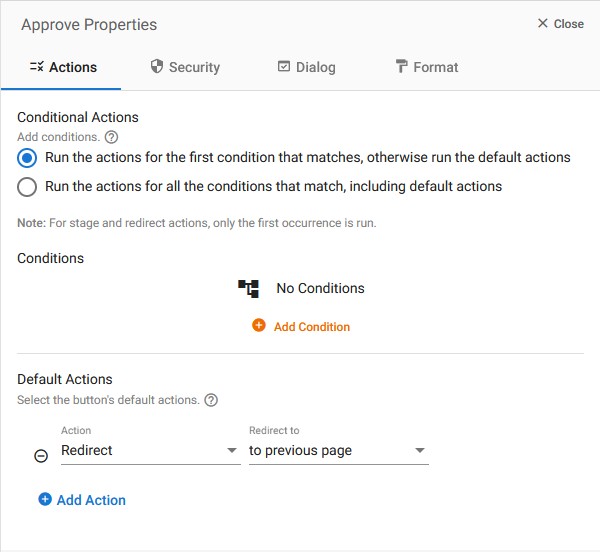
Conditional Actions have a logical test associated with them, such as “Department field contains Sales” or “Total Value field is greater than 10,000”. If this test is true, then the associated conditional action will run. There can be multiple conditional actions, and each can have more than one condition it must meet. You can also choose to run only the actions of the first condition that is met, and if no conditions are met then the default action will run – OR – run actions for all conditions that are met, including the default action.
Note: If you have multiple change stage or redirect actions run at the same time, only the first occurrence will run.
Default Actions will run when the action button is clicked. If you have no conditional actions, the Default Action will always run. If there is a conditional action that matches the current situation, the Default Action will not run unless the second Conditional Option is chosen. There can be multiple default actions, such as moving the record to the next workflow stage and also sending a notification email.
Security
The Action Button security is where you configure the button’s visibility. Additional role-based, stage specific button visibility can be configured in the Field Security.
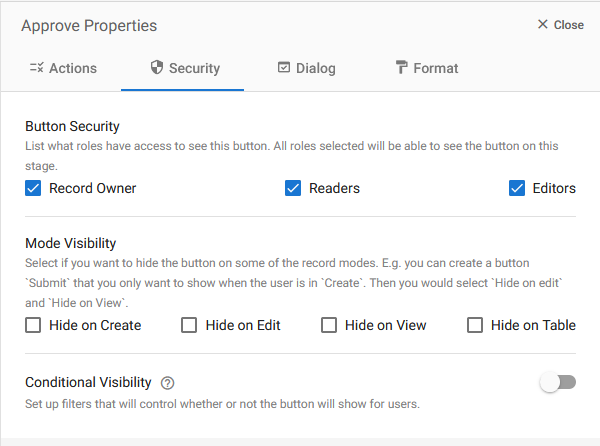
Button Security determines which roles have the ability to see the button. If you add a new role to your application after creating an action button, the new role will not have access to view the button – you must check the box manually.
Mode Visibility allows you to hide the button on specific record modes, e.g., during Create, Edit, View, or on a Table.
Conditional Visibility determines the visibility of button based on whether or not certain conditions are met, e.g., only show the button if the value of a currency field is greater than 10,000.
Dialog
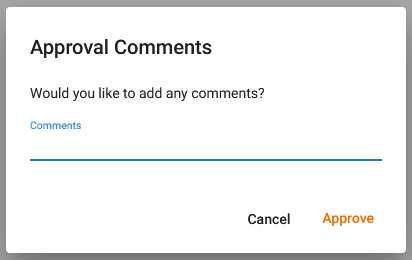
In this section you can add a Confirmation Dialog to your action button. With this option, when a user clicks the action button a confirmation box will pop-up before running the action. The user may cancel, continue with the action, or fill out up to three (3) predetermined fields from your form before continuing.
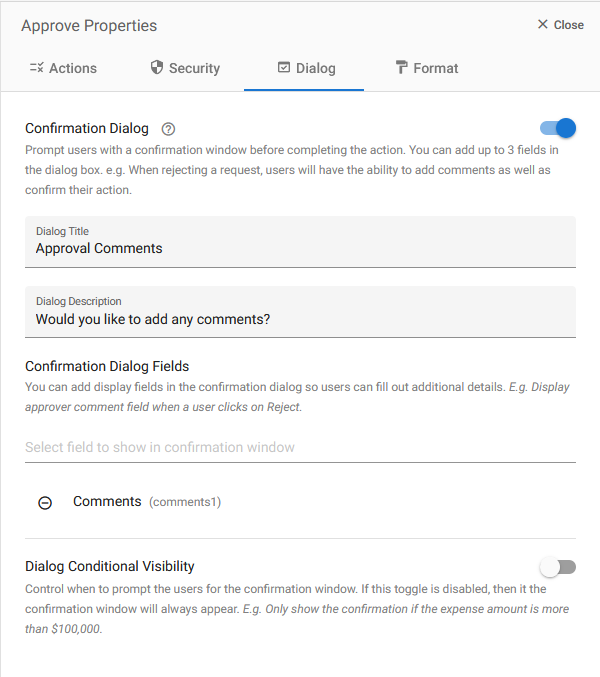
Dialog Title will display at the top of the dialog.
Dialog Description will display below the title in the dialog.
Confirmation Dialog Fields allows you to add up to three (3) fields from your form to the dialog. Depending on the field security, these fields may be edited or filled out within the dialog.
Dialog Conditional Visibility determines if the dialog will display depending on whether or not specific conditions are met.
Format
The Format section is where you design the appearance of your button, i.e., how it displays to users.
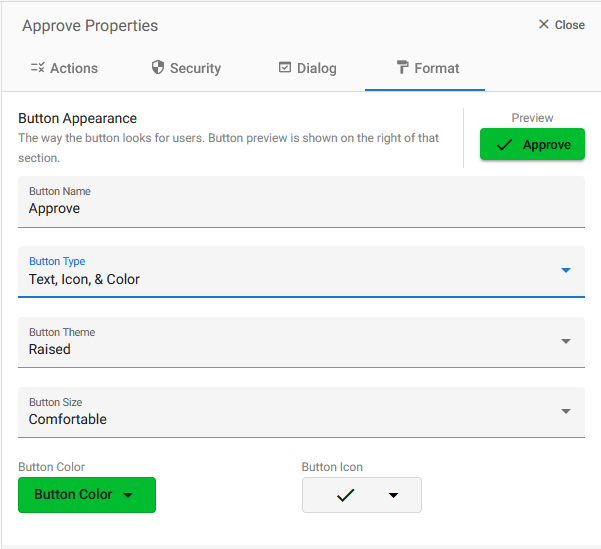
The top-right corner displays a preview of changes as you make them.
Workflow Security
The Security section is where you define workflow level security, i.e., who can do what with the records created with this form. In this section you determine who can view, edit, or delete records. You can even define who can see or edit each individual field or section, at each workflow stage.
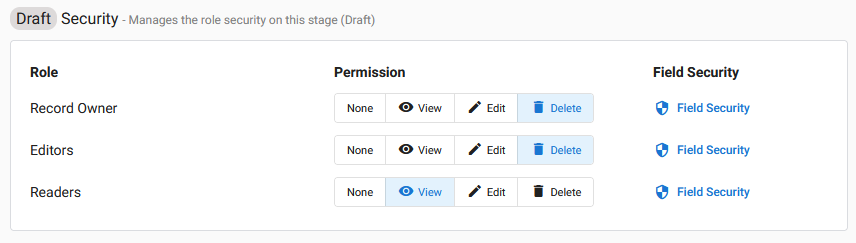
Role & Permission
The Role list simply displays all your application roles.
The Permission here are role specific, and are general permissions for records in this stage of the workflow. The Permission options are:
- None: Records at the current stage will be completely invisible to the associated role.
- View: Users in the role will only be able to view records at this stage, not edit or delete them.
- Edit: Users in the role can edit records at this stage, but not delete them.
- Delete: Users in the role can edit and delete records at this stage.
Note: If you give a role View permissions here, you will not be able to set any field or section to Edit in the Field Security. If you select None, the Field Security options will be hidden for this role.
Field Security
Depending on the Permission setting you chose for the role, Field Security allows you to set even more specific field and section permissions.
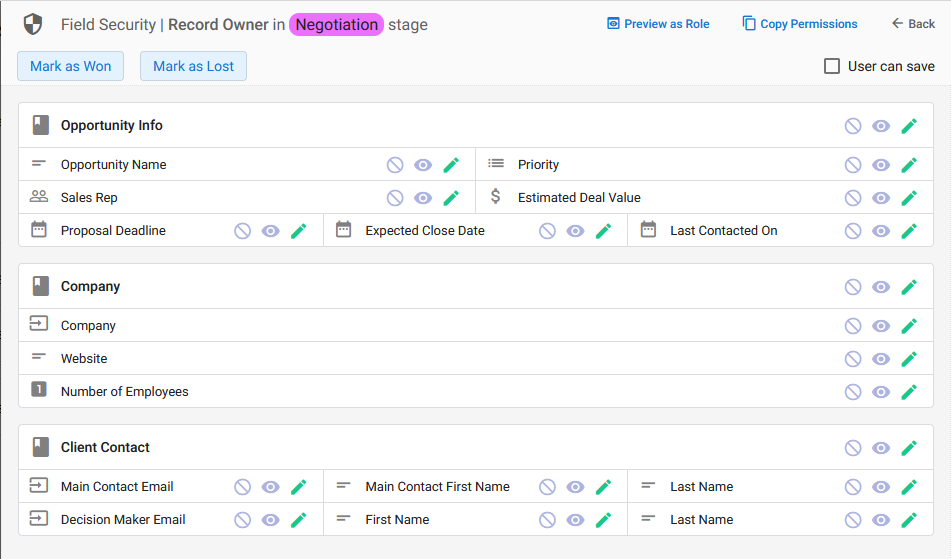
Header Overview
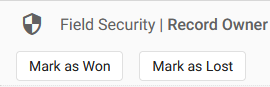
In the top-left corner of the image above, you can see that this is the Field Security for the Record Owner role in the Negotiation workflow stage.
Right below that are the Action Buttons for the Negotiation stage highlighted in blue: Mark as Won and Mark as Lost. This means that the Record Owner role can see and click these Action Buttons. You may select the buttons here to hide them from the role; when hidden from the role they will display White here (but they will be invisible on the form).
In the top-right corner, Preview as Role opens your form from the perspective of the role. As you make changes to permissions, use this option to make sure the role is seeing exactly what you want.
Copy Permissions allows you to copy section & field permissions that you set for this role, and apply them to other roles. After selecting this option, a dialog will open where you can choose to copy either All Fields, Specific Sections, or Specific Fields. You will then choose which stages and roles you want to apply them to.
If you check the ‘User can save‘ checkbox, users in this role will be able to save any edits or changes they make to the record at this stage, without moving it through the workflow. That is, a save icon will display in the top right corner of the record, enabling them to make changes to the record without needing to use the action buttons. This option only displays if the role has Edit or Edit & Delete permissions for this stage.
Section & Field Permissions
All of your form’s sections and fields are laid out in the Field Security panel. For each field and section, you can pick one of three (3) permission settings: Hidden, Readonly, or Edit.

- Hidden means the field or section will be completely invisible to the role at this stage.
- Readonly means the role can see the field or section, but not edit it at this stage.
- Edit means the role can edit the field or section at this stage.
Note: Changing a Section’s permission settings will change all fields within that section to that setting. That said, you can still change individual field permissions afterward. Section permissions are a good way to quickly change all field permissions simultaneously if, for example, you want the majority of fields to be Readonly, and only a few editable.
Next Steps
Learn more about Roles & Users here.
Learn about creating Email Templates for your workflows here and here.
Create PDF Templates for your workflows. Learn more here.